Zenith
Transoceanic Page
As a kid many years ago
(DON'T ASK!), I fell in love with old radios. There were many I was able to
play with, (I knew someone that owned one) but many I could not to play with, (I
couldn't afford to buy it). Over the years I have enjoyed many radios, but I
still longed for those I remember from my youth. Thanks to the internet and EBay
I could finally find, purchase and own some of my dream radios. One series I
really enjoyed was the Zenith line of radios. I finally bought a Zenith
Transoceanic R-7000 in the 1970's, but like a dummy, sold it to someone that
offered more than I paid for it years later. Fast forward to 2011 and I
found a couple of jewels on EBay. One was the H500 model built on Sept. 17,
1951. This Transoceanic was in fair cosmetic and electrical condition, but
perfect for a restoration. I decided to build this page and detail my work with
photos and captions in the hope that it may help someone following the same
path. I will try and keep things simple and with a beginner in mind. If you have
any questions you can email me at the link at the bottom of the page. Also
included are some pictures of my B600 after restoring it so you can compare the
two models.
 Front
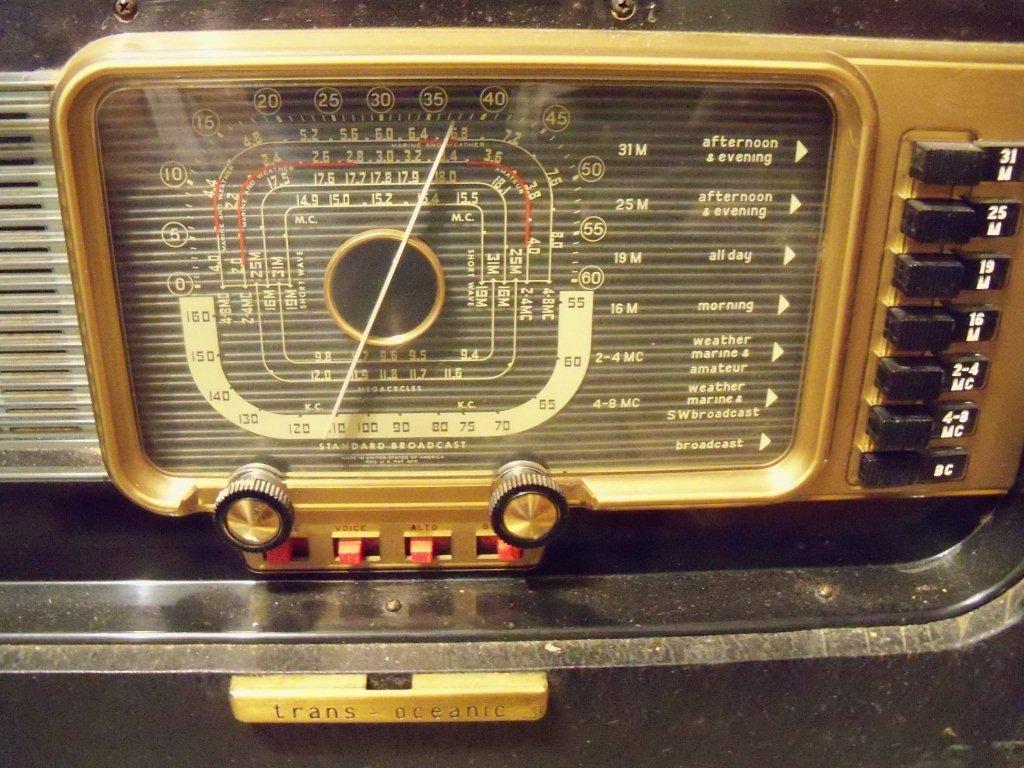
Dial - Looks ok, dirty of course, some light scratches around the tuning and
volume knobs and the display is slightly hazy. No major stress cracks around the
screw holes visible. Should clean up well and a little Novis plastic polish will
fix things right up!
Front
Dial - Looks ok, dirty of course, some light scratches around the tuning and
volume knobs and the display is slightly hazy. No major stress cracks around the
screw holes visible. Should clean up well and a little Novis plastic polish will
fix things right up!
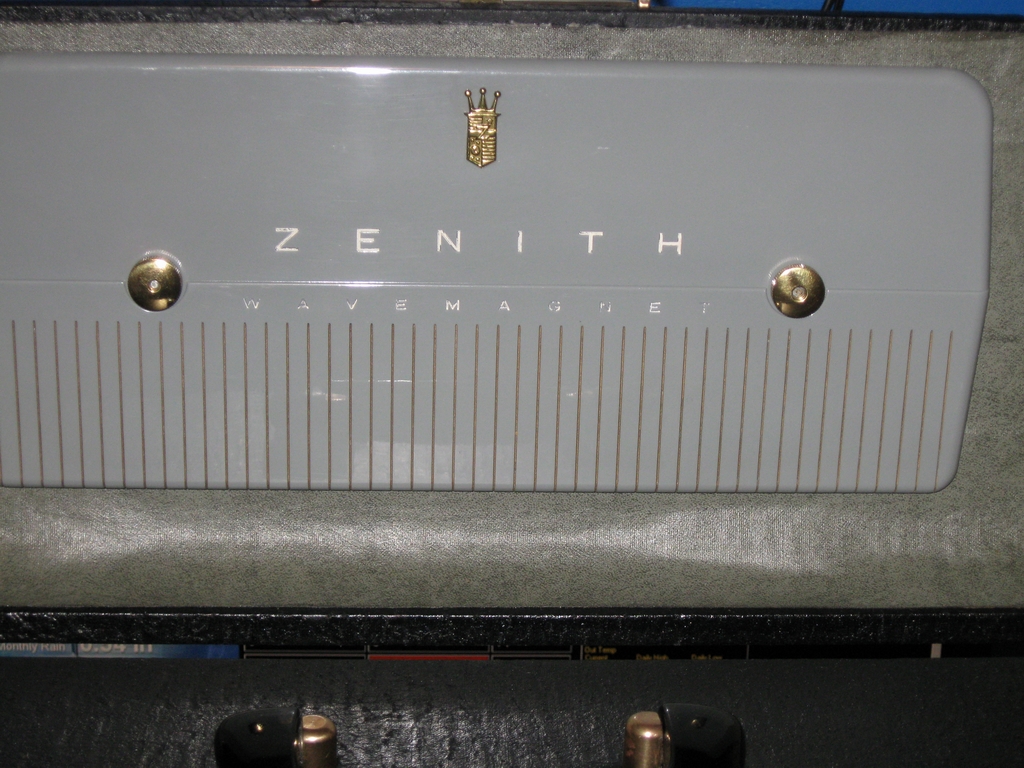
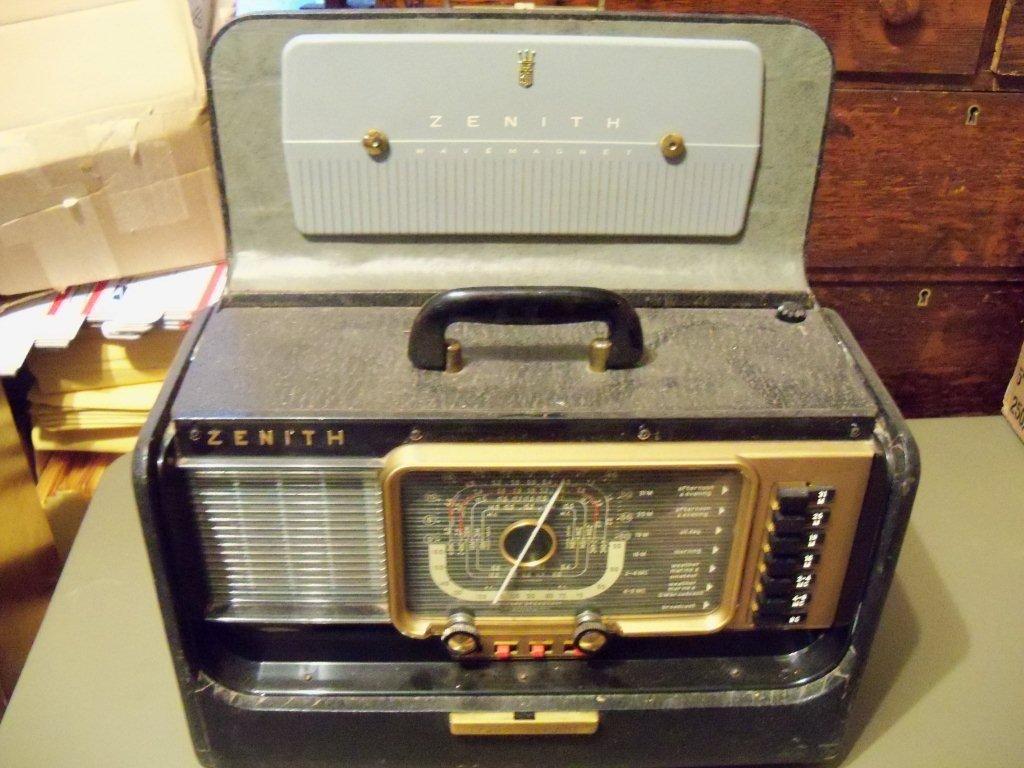 Front
Shot - Cabinet really looks dirty. Is that dirt or cracks in the Stag
covering material?? Lettering on the Wavemagnet has faded from white to light
tan. The vertical gold inlay striping looks ragged and both will need fresh
paint. At least the band selector button lettering is nice and white.
Front
Shot - Cabinet really looks dirty. Is that dirt or cracks in the Stag
covering material?? Lettering on the Wavemagnet has faded from white to light
tan. The vertical gold inlay striping looks ragged and both will need fresh
paint. At least the band selector button lettering is nice and white.
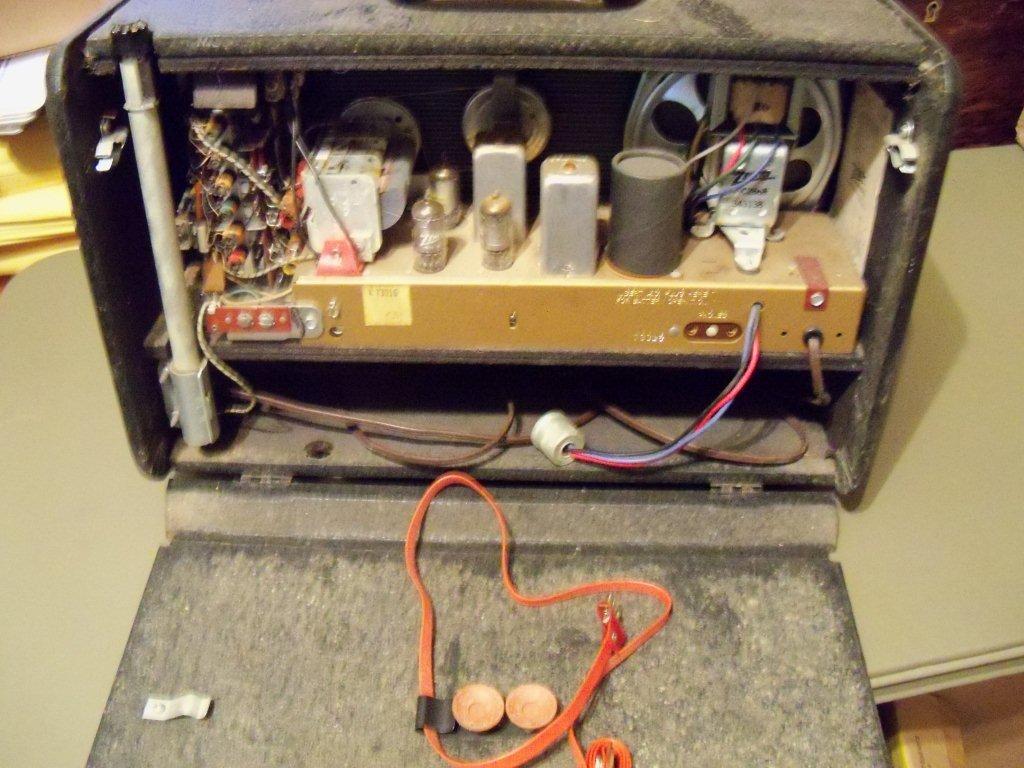 Rear
Shot - With the back cover open you can really see some dirt or damage.
Chassis looks ok, but dirty and nothing major showing. Everything is there! All
tubes in place and appear to be original Zenith! Power cord in fair shape, will
need to replace that. Accessories for the Wavemagnet antenna are there! (Suction
cups and orange antenna cord)
Rear
Shot - With the back cover open you can really see some dirt or damage.
Chassis looks ok, but dirty and nothing major showing. Everything is there! All
tubes in place and appear to be original Zenith! Power cord in fair shape, will
need to replace that. Accessories for the Wavemagnet antenna are there! (Suction
cups and orange antenna cord)
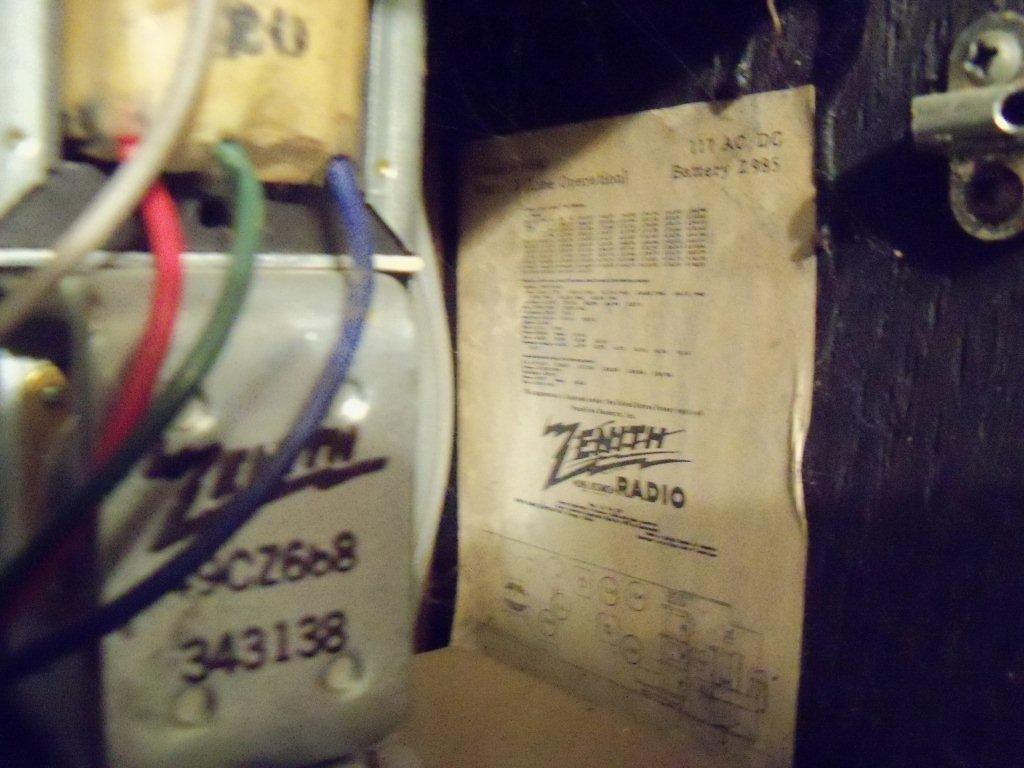 Inside
Rear - A good sign, the original Zenith data sticker is still there and
intact. A bit faded, but hey, this thing is 60 years old! You'll be a little
faded at 60 too.
Inside
Rear - A good sign, the original Zenith data sticker is still there and
intact. A bit faded, but hey, this thing is 60 years old! You'll be a little
faded at 60 too.
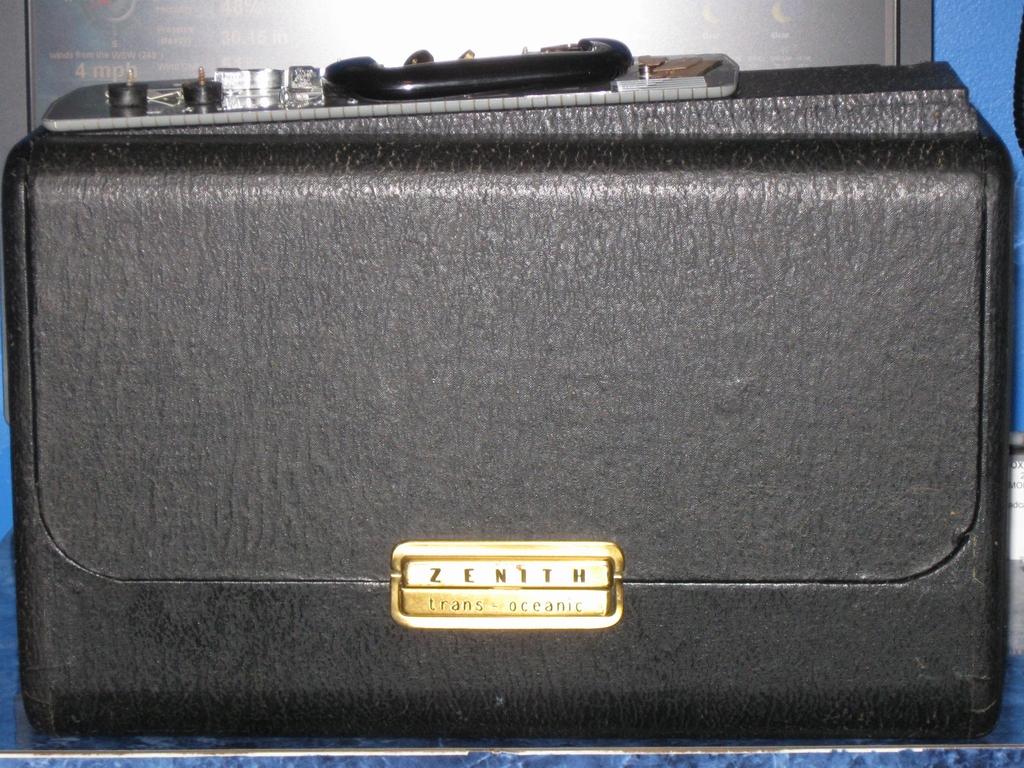
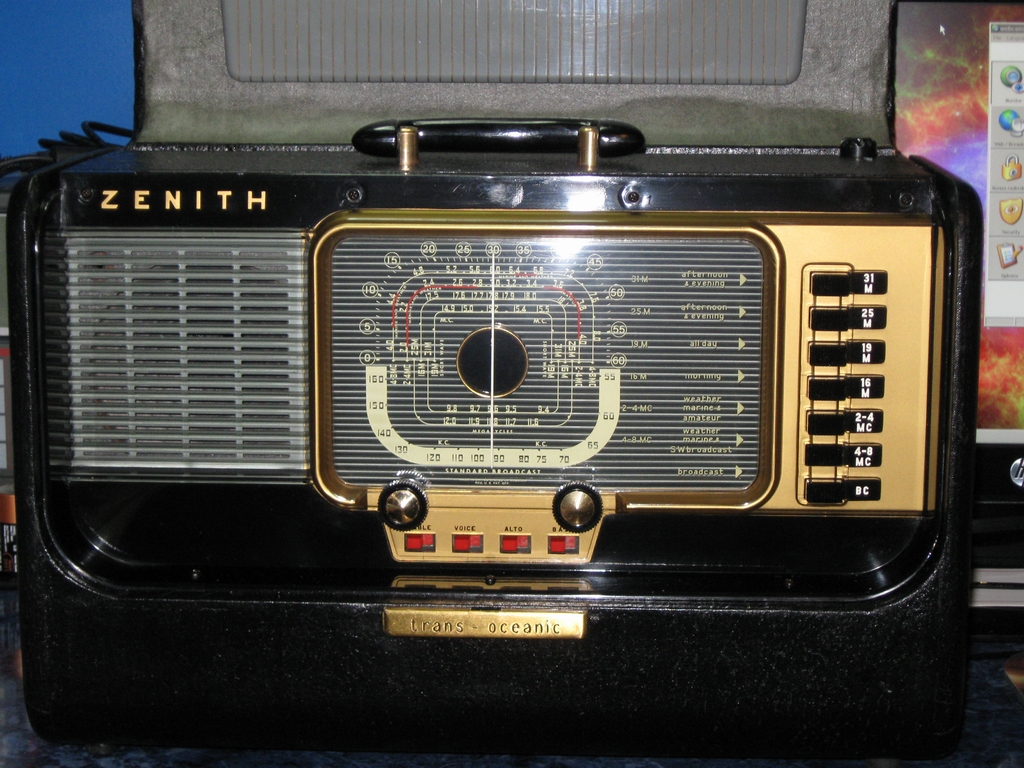
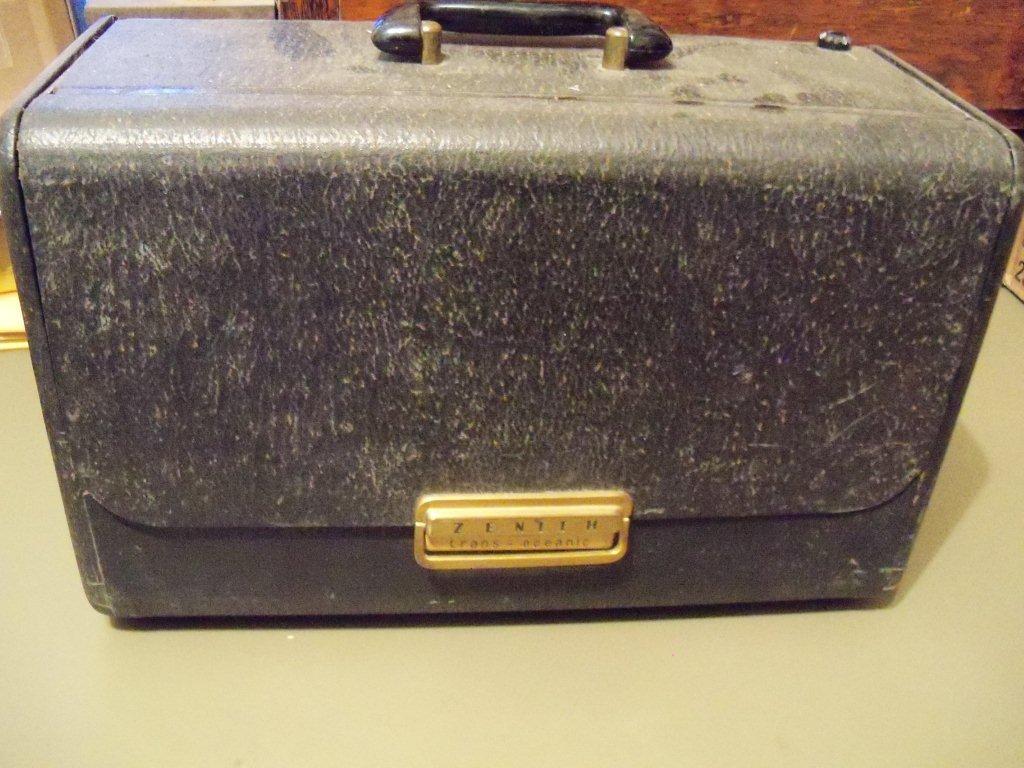 Front
Cover Closed - Handle is there, front latch is there. Brass looks tarnished
at the handle and will need a good polishing to get it bright and shiny again.
That stag covering is looking really bad here, corners look ok though.
Front
Cover Closed - Handle is there, front latch is there. Brass looks tarnished
at the handle and will need a good polishing to get it bright and shiny again.
That stag covering is looking really bad here, corners look ok though.
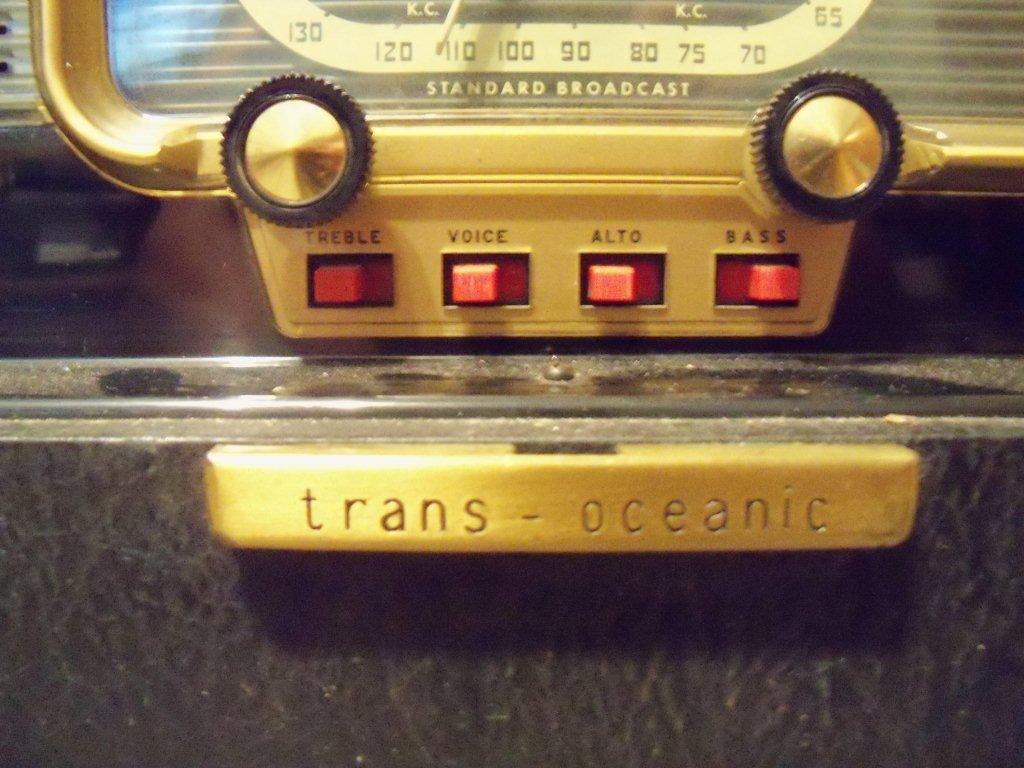 Front
Controls - OK, the knob brights are there (brass inserts) but the knobs are
in terrible shape with dirt embedded in every groove, tone control buttons a bit
dirty but work back and forth with no sticking. The brass catch at the bottom
looks good. The black paint in the logo might need to be touched up a tad.
Front
Controls - OK, the knob brights are there (brass inserts) but the knobs are
in terrible shape with dirt embedded in every groove, tone control buttons a bit
dirty but work back and forth with no sticking. The brass catch at the bottom
looks good. The black paint in the logo might need to be touched up a tad.
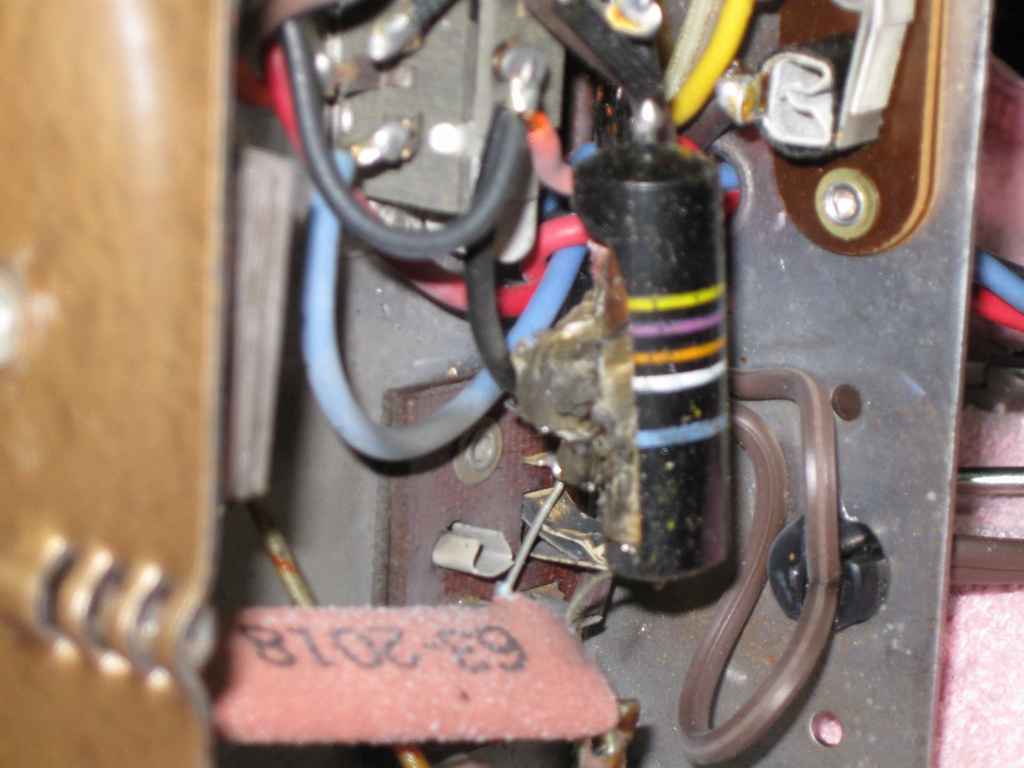 Chassis
Out - Electrical inspection shows damage to a number of components. Even
though the radio did work, there were several issues that HAD to be addressed.
Here C38 has exploded at some point in the past.
Chassis
Out - Electrical inspection shows damage to a number of components. Even
though the radio did work, there were several issues that HAD to be addressed.
Here C38 has exploded at some point in the past.
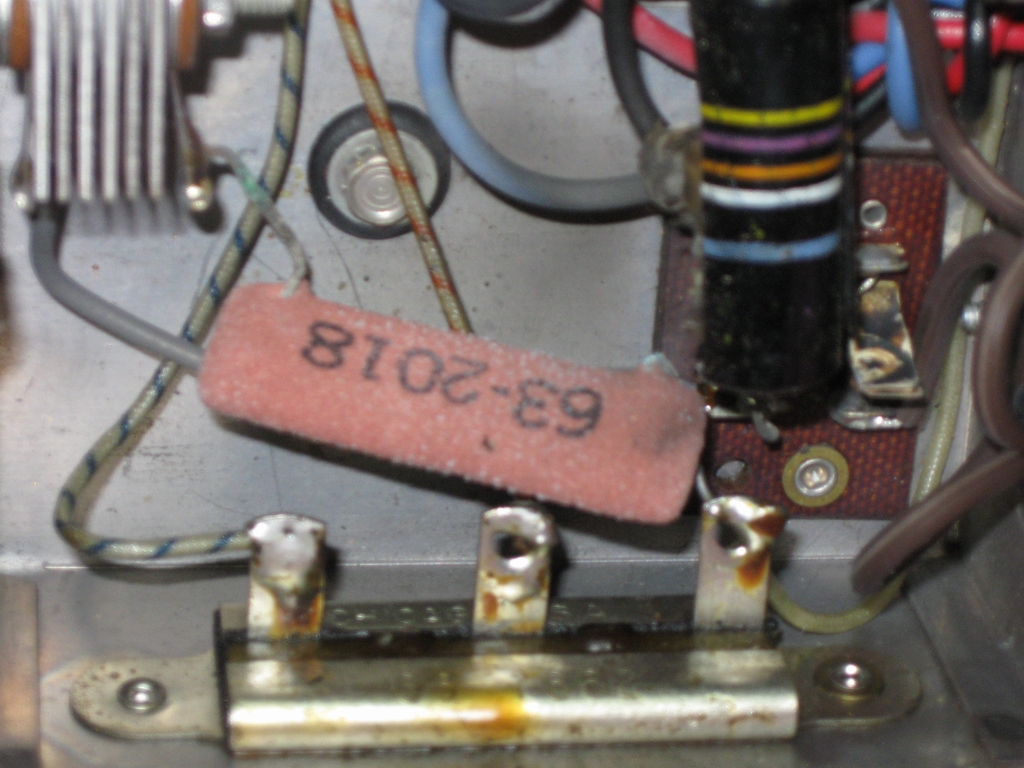 Power
Supply - Here are most of the components making up the AC supply. The
selenium rectifier in the upper left, R36 the large wire wound resistor and C38.
You can see the blast damage from C38 on the blue wire and chassis. The value of
R36 has changed and the wire coming from it are very corroded, it has to go.
Power
Supply - Here are most of the components making up the AC supply. The
selenium rectifier in the upper left, R36 the large wire wound resistor and C38.
You can see the blast damage from C38 on the blue wire and chassis. The value of
R36 has changed and the wire coming from it are very corroded, it has to go.
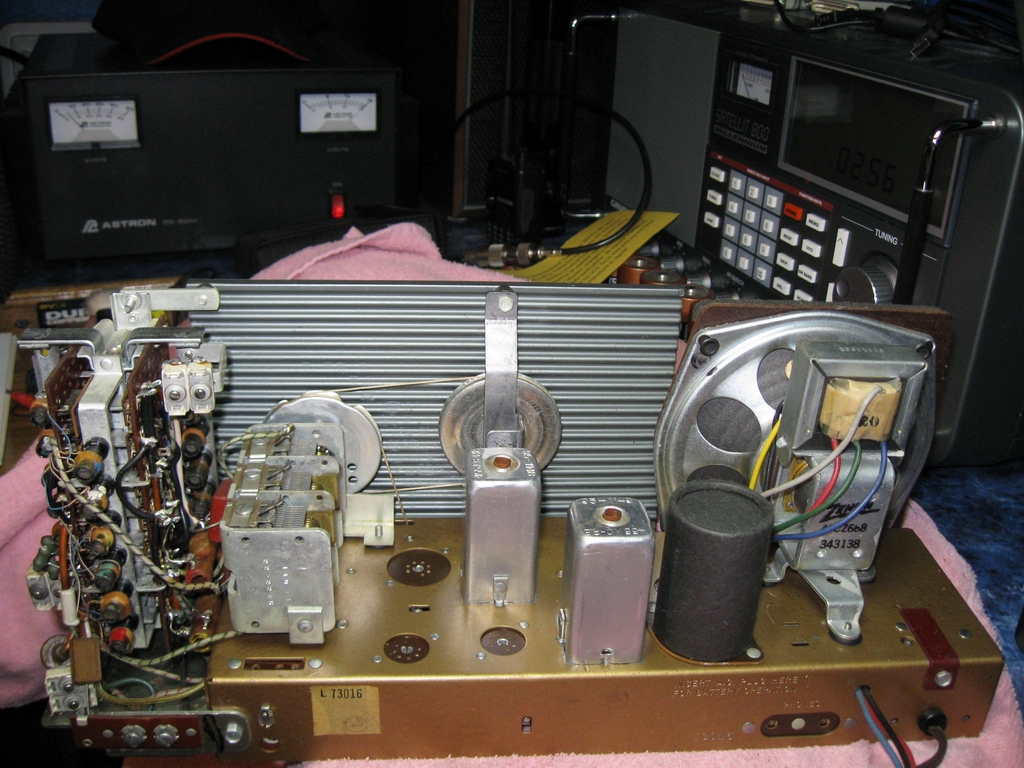 Top
Side View - Here you can see the band coil/switch assembly at the far left.
All the band switches were very noisy when switched, when they worked. The
contacts are silver plated and very tarnished. The main tuning capacitor next to
the band coils was also in need of attention, hard to turn and scratchy.
Top
Side View - Here you can see the band coil/switch assembly at the far left.
All the band switches were very noisy when switched, when they worked. The
contacts are silver plated and very tarnished. The main tuning capacitor next to
the band coils was also in need of attention, hard to turn and scratchy.
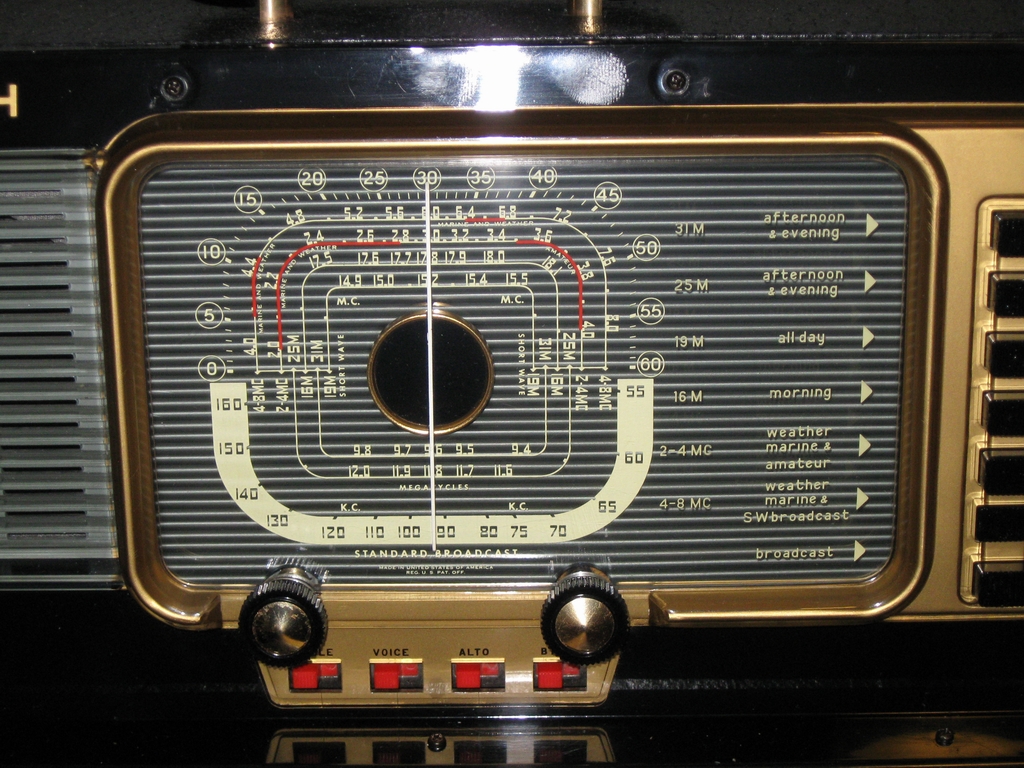
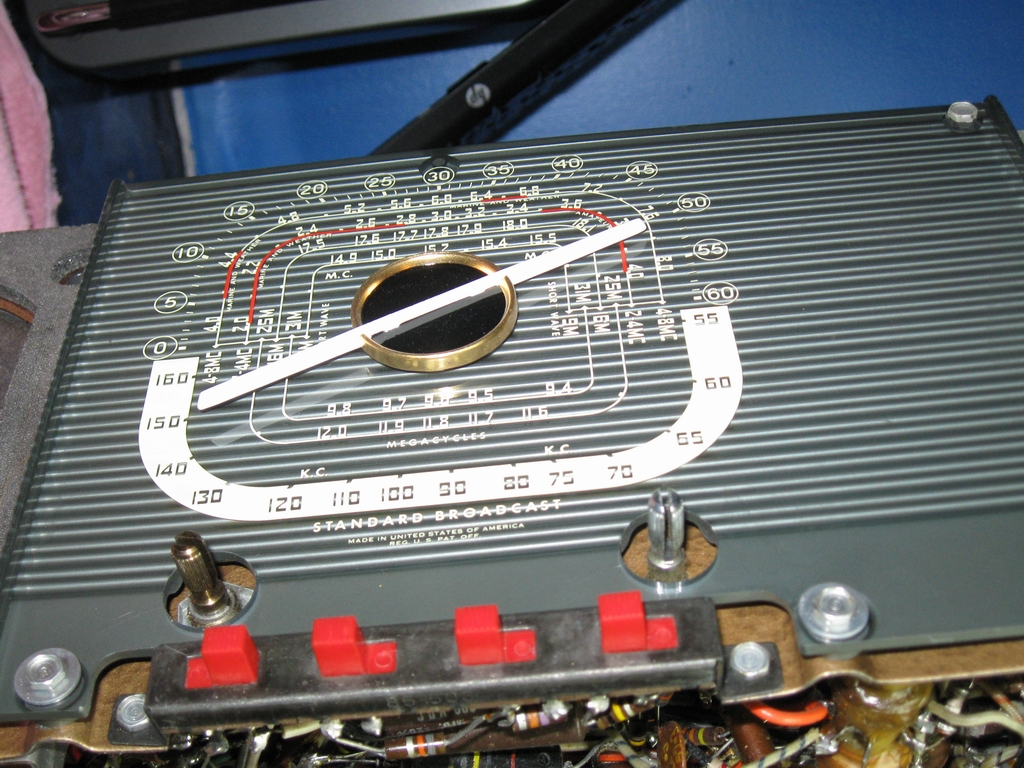 Dial
Assembly - The dial plate is plastic with painted on lettering. All the
lettering is in pristine condition. All it will get is a gentle cleaning and
some Novis polish.
Dial
Assembly - The dial plate is plastic with painted on lettering. All the
lettering is in pristine condition. All it will get is a gentle cleaning and
some Novis polish.
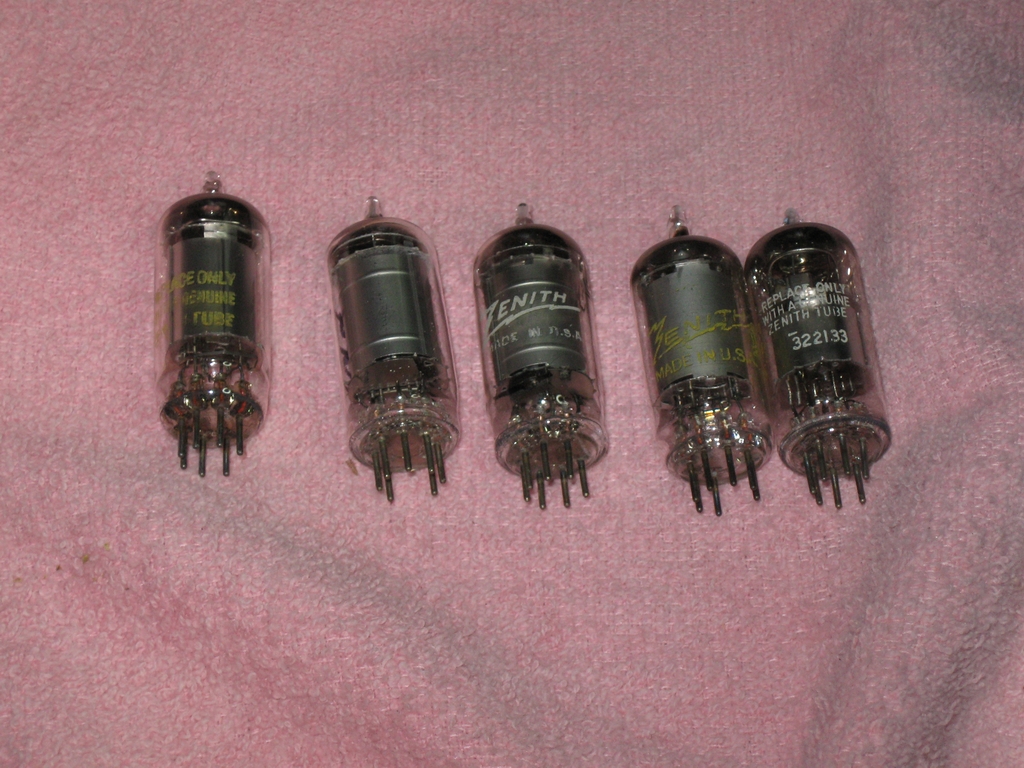 All
the Tubes - Much to my surprise, ALL the tubes are original Zenith branded.
Either it never needed tubes or when replaced, Zenith brands were reinstalled.
All tubes checked very good on the tube tester. I also opted to replace the very
expensive 1L6 ($50 to $100) with the direct replacement 1LA6 ($5.90 at AES
http://www.tubesandmore.com/). To do
this you'll need to find an adapter. I found 3 on EBay and bought 2 since I have
two Trans-oceanics. This one from 1951 and a B600 made in 1962.
All
the Tubes - Much to my surprise, ALL the tubes are original Zenith branded.
Either it never needed tubes or when replaced, Zenith brands were reinstalled.
All tubes checked very good on the tube tester. I also opted to replace the very
expensive 1L6 ($50 to $100) with the direct replacement 1LA6 ($5.90 at AES
http://www.tubesandmore.com/). To do
this you'll need to find an adapter. I found 3 on EBay and bought 2 since I have
two Trans-oceanics. This one from 1951 and a B600 made in 1962.
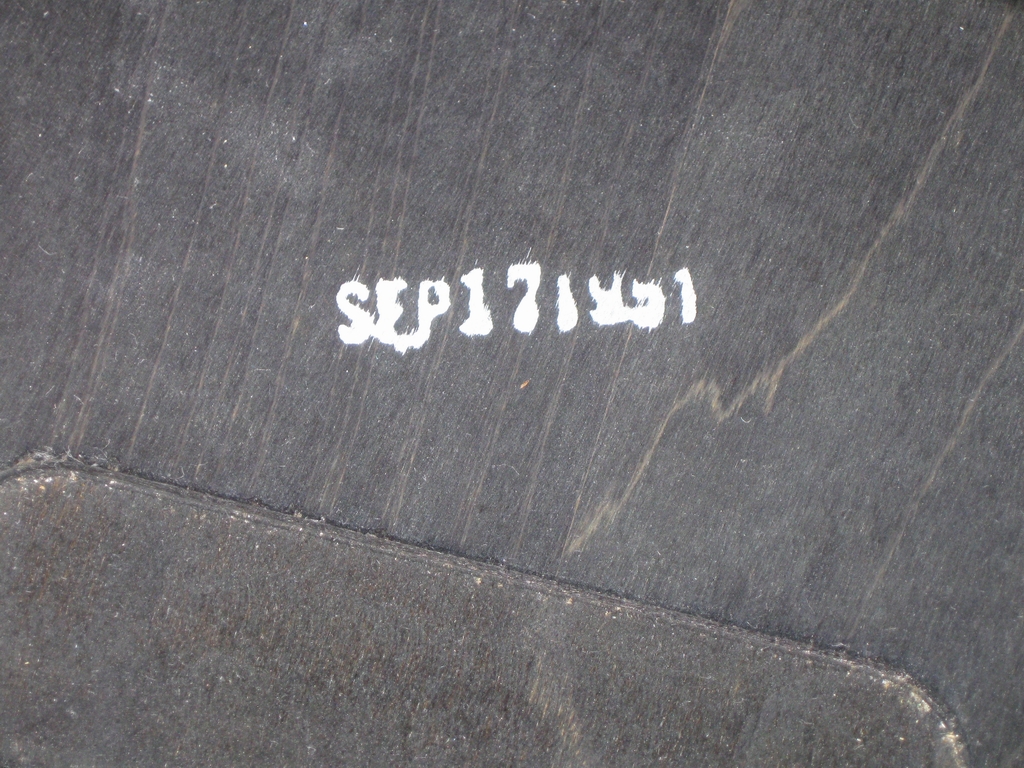 Made
in the USA - Here is the date stamped to the case beneath the chassis,
Sept 17, 1951
Made
in the USA - Here is the date stamped to the case beneath the chassis,
Sept 17, 1951
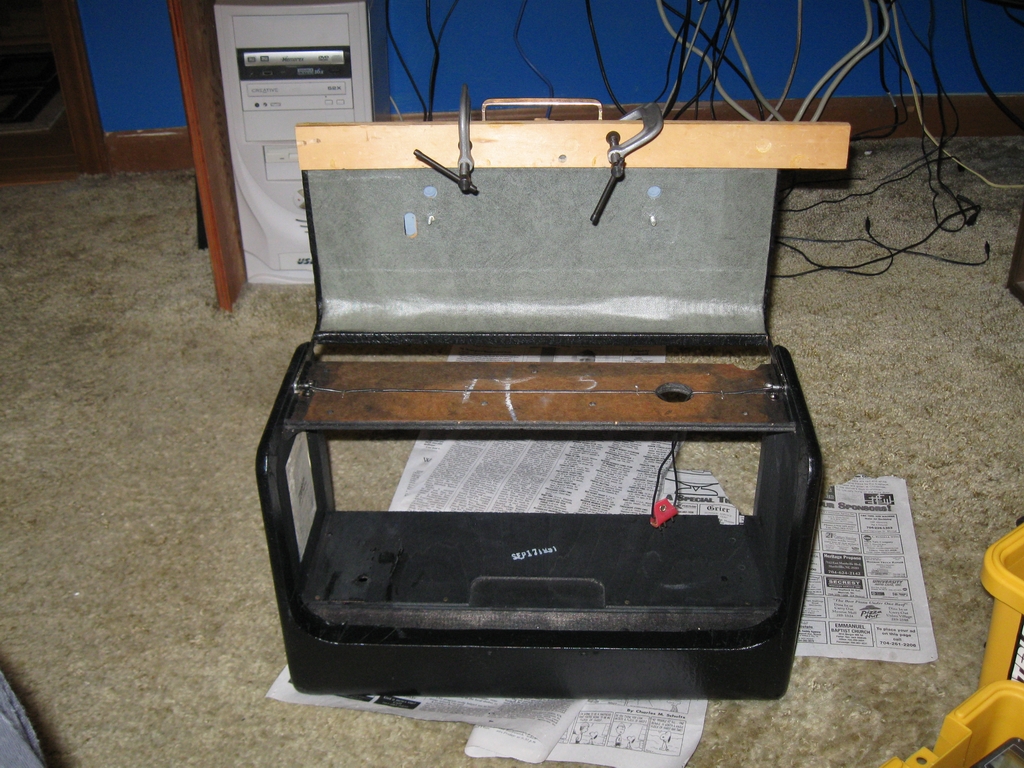 The
Case - Here I am re-gluing the cover behind the wave magnet. I had to pull
just enough away from the lid to allow me to remove the upper latch for
cleaning. Also you can tell the case has already been dyed black. I was super
pleased to find that the stag fabric was intact everywhere! The original dye had
just faded showing the wood beneath making it look as if it was damaged. I also
found the plywood on the left side at the chassis mounting hole to have
separated. I used some all purpose white glue (Elmer's) to repair that and used
the C-clamps to hold the pressure strip on top till the glue dried. There is
another section of case you must remove from the top where the handle attaches
if you plan to polish the brass mounting pins for the handle. This also lets you
test the Wave Magnet wiring for continuity. You can see the end of the wires
that attach to the chassis (red tag). Those wires run up through the top and
attach to the hinge bars for the top cover. Put the Wave Magnet antenna in place
with it's attaching thumb screws (yes the studs are different sizes) and check
for poor or intermittent contact. You should read a steady 1-3 ohms as you work
the lid opened and closed.
The
Case - Here I am re-gluing the cover behind the wave magnet. I had to pull
just enough away from the lid to allow me to remove the upper latch for
cleaning. Also you can tell the case has already been dyed black. I was super
pleased to find that the stag fabric was intact everywhere! The original dye had
just faded showing the wood beneath making it look as if it was damaged. I also
found the plywood on the left side at the chassis mounting hole to have
separated. I used some all purpose white glue (Elmer's) to repair that and used
the C-clamps to hold the pressure strip on top till the glue dried. There is
another section of case you must remove from the top where the handle attaches
if you plan to polish the brass mounting pins for the handle. This also lets you
test the Wave Magnet wiring for continuity. You can see the end of the wires
that attach to the chassis (red tag). Those wires run up through the top and
attach to the hinge bars for the top cover. Put the Wave Magnet antenna in place
with it's attaching thumb screws (yes the studs are different sizes) and check
for poor or intermittent contact. You should read a steady 1-3 ohms as you work
the lid opened and closed.
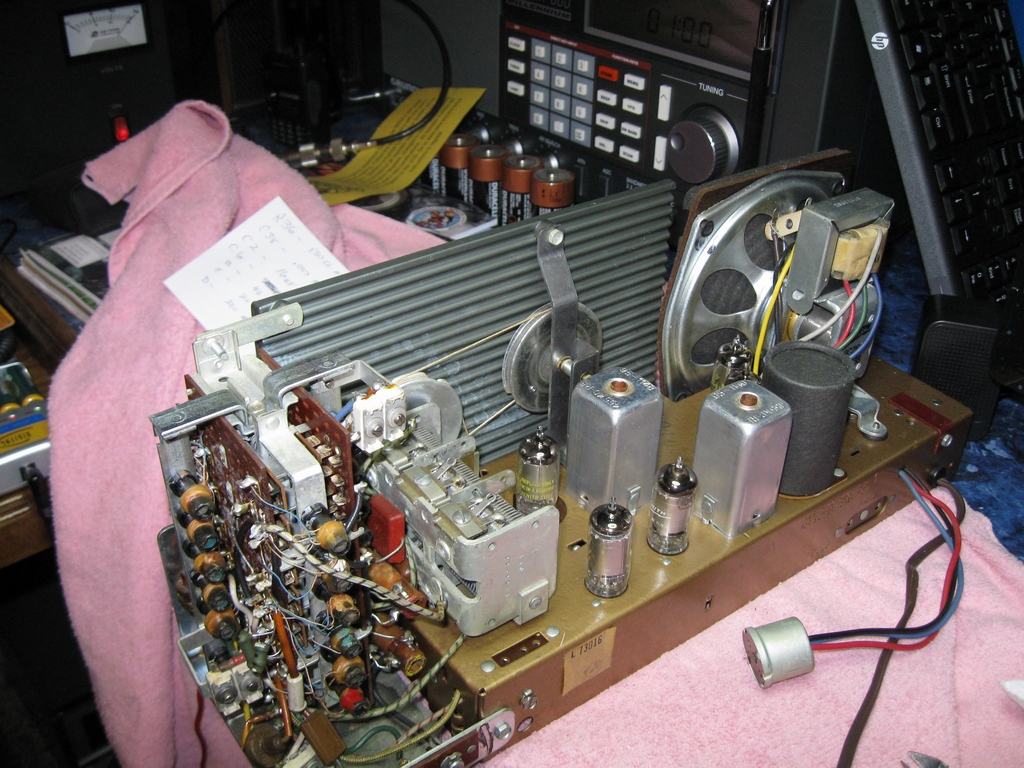 Chassis
Clean - Here I have cleaned and polished the chassis, tested and reinstalled
the tubes, cleaned and lubricated the main tuning capacitor, and polished the IF
cans. The speaker was like new, no holes, cracks or tears. The dial cord was
original believe it or not, but it did break while working on the tuning
capacitor. I will use Dacron fishing line to replace the broken dial cord. This picture was
taken before I replaced the line.
Chassis
Clean - Here I have cleaned and polished the chassis, tested and reinstalled
the tubes, cleaned and lubricated the main tuning capacitor, and polished the IF
cans. The speaker was like new, no holes, cracks or tears. The dial cord was
original believe it or not, but it did break while working on the tuning
capacitor. I will use Dacron fishing line to replace the broken dial cord. This picture was
taken before I replaced the line.
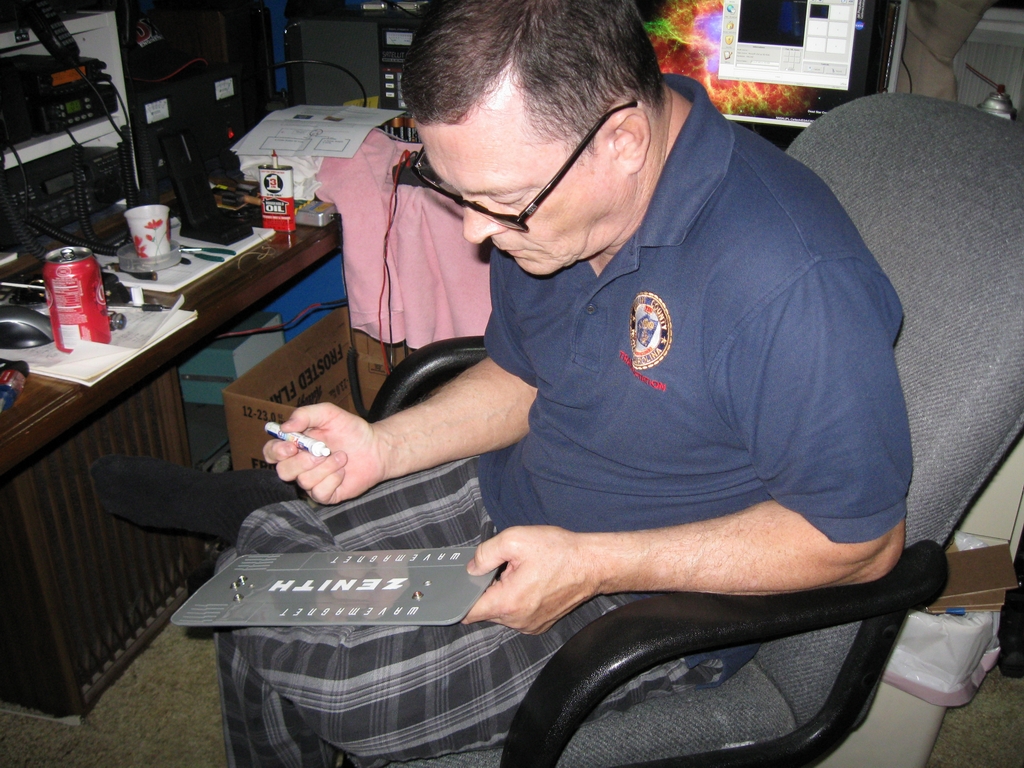
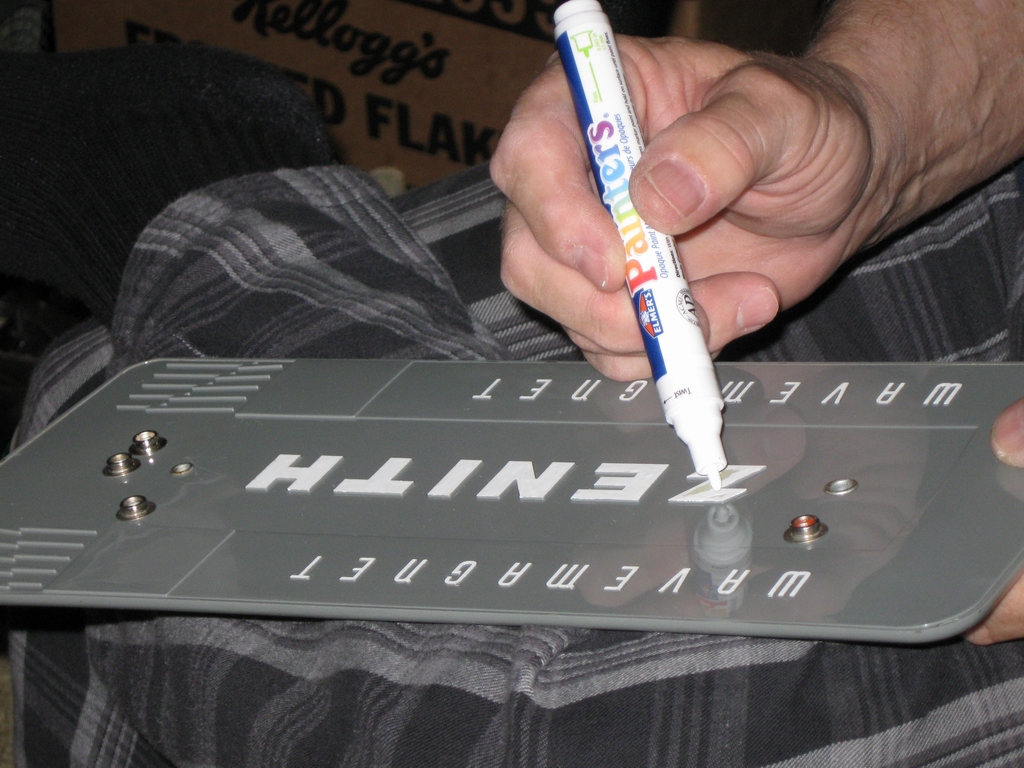 Repainting
- I decided to repaint the lettering on the Wave Magnet antenna. I just did not
like the faded white (it looked almost beige). Here I am using an Elmer's
painters pen from the crafts section at Wal-mart. You can also use modelers
paint. You can find this at most any hobby shop along with thinner, brushes and
lots of other things you might find a need for.
Repainting
- I decided to repaint the lettering on the Wave Magnet antenna. I just did not
like the faded white (it looked almost beige). Here I am using an Elmer's
painters pen from the crafts section at Wal-mart. You can also use modelers
paint. You can find this at most any hobby shop along with thinner, brushes and
lots of other things you might find a need for.
 Checking
- Finished with the first coating of paint. It will need 2 more before I am
happy. I also used small bottles of modelers paint and a brush to touch-up other
areas of the front panel. You'll may also prefer to use a brush to apply white paint to the
engraved lettering on the Wave Magnet front side. I used a bottle of white,
black and gold paints. The back side of the front plastic panel is painted using
black and gold and may have flaked off or can do so with you handling it. Ask me
how I know this! I found the color Faspearl Gold to be the best match. It is
about a shade lighter than what was used, but after drying you can't see the
difference from the front of the panel.
Checking
- Finished with the first coating of paint. It will need 2 more before I am
happy. I also used small bottles of modelers paint and a brush to touch-up other
areas of the front panel. You'll may also prefer to use a brush to apply white paint to the
engraved lettering on the Wave Magnet front side. I used a bottle of white,
black and gold paints. The back side of the front plastic panel is painted using
black and gold and may have flaked off or can do so with you handling it. Ask me
how I know this! I found the color Faspearl Gold to be the best match. It is
about a shade lighter than what was used, but after drying you can't see the
difference from the front of the panel.
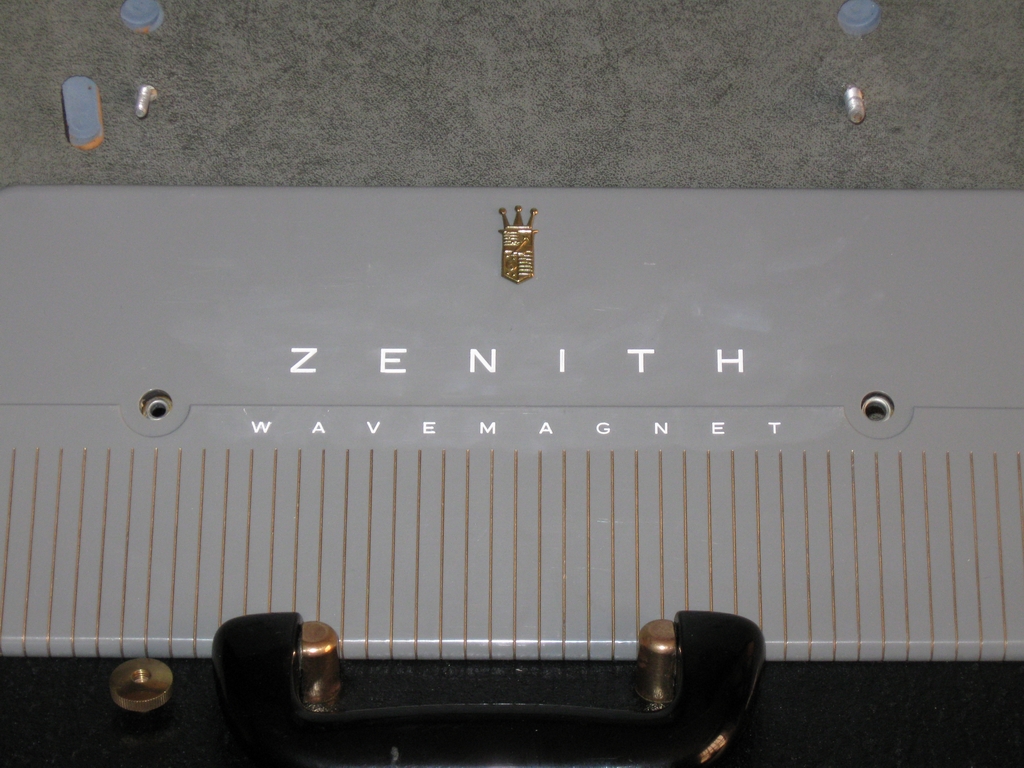
 Wave
Magnet - Here you can see how bad the paint was on the front of the Wave
Magnet antenna. This is where you need a brush, since these letters are engraved
not raised. You can also see the brass studs holding the handle after a good
polishing.
Wave
Magnet - Here you can see how bad the paint was on the front of the Wave
Magnet antenna. This is where you need a brush, since these letters are engraved
not raised. You can also see the brass studs holding the handle after a good
polishing.
 New
Paint - This is the shot of the Wave magnet after repainting. It still needs
a final cleaning and polish with Novis Plastic Polish. The Gold vertical
striping looked OK and I almost decided to repaint it, but decided to leave a
little of that "Old Radio" look. You can also see the mounting studs for the
handle after polishing and one of the thumb-screws that hold the Wave Magnet.
New
Paint - This is the shot of the Wave magnet after repainting. It still needs
a final cleaning and polish with Novis Plastic Polish. The Gold vertical
striping looked OK and I almost decided to repaint it, but decided to leave a
little of that "Old Radio" look. You can also see the mounting studs for the
handle after polishing and one of the thumb-screws that hold the Wave Magnet.
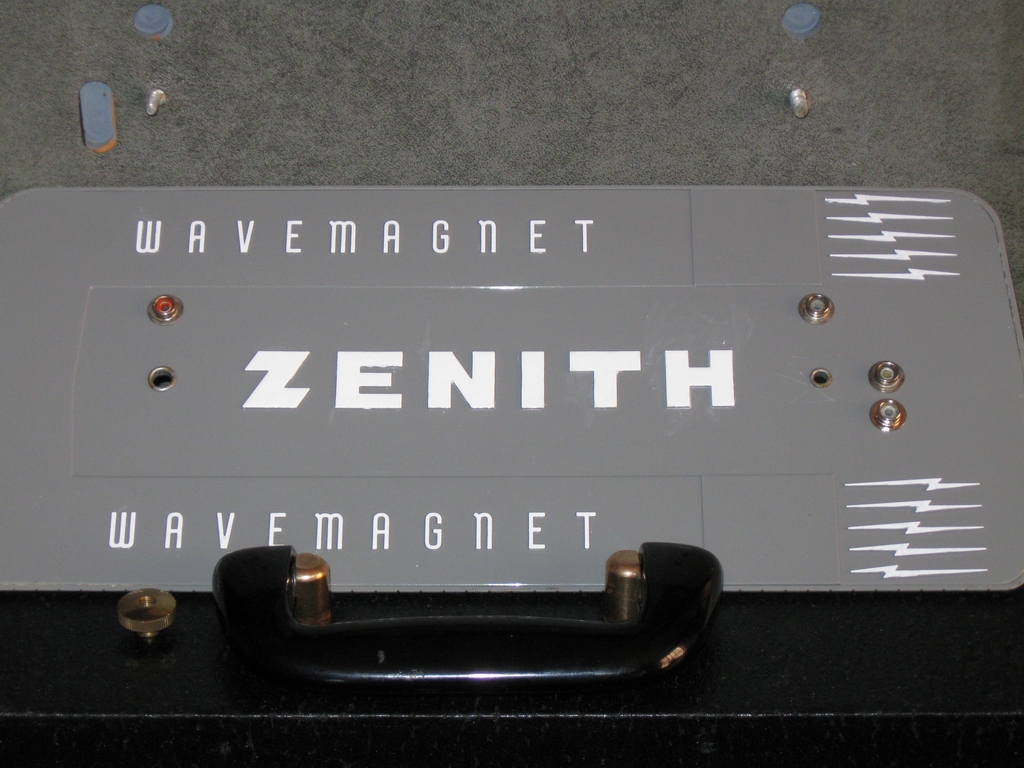 Back
Side - Here is the back of the Wave Magnet after painting. Still needs a
final cleaning and polish. I also went a little over-board and painted the Art
Deco "Z's" to the right. Those were not painted originally, but I liked it! You
can also see some scratches around the right contact for the antenna. Someone in
the past had tried scraping the contact for a better connection. Both contacts
were a bit oxidized so I gave them some attention....without scratching the
plastic!
Back
Side - Here is the back of the Wave Magnet after painting. Still needs a
final cleaning and polish. I also went a little over-board and painted the Art
Deco "Z's" to the right. Those were not painted originally, but I liked it! You
can also see some scratches around the right contact for the antenna. Someone in
the past had tried scraping the contact for a better connection. Both contacts
were a bit oxidized so I gave them some attention....without scratching the
plastic!
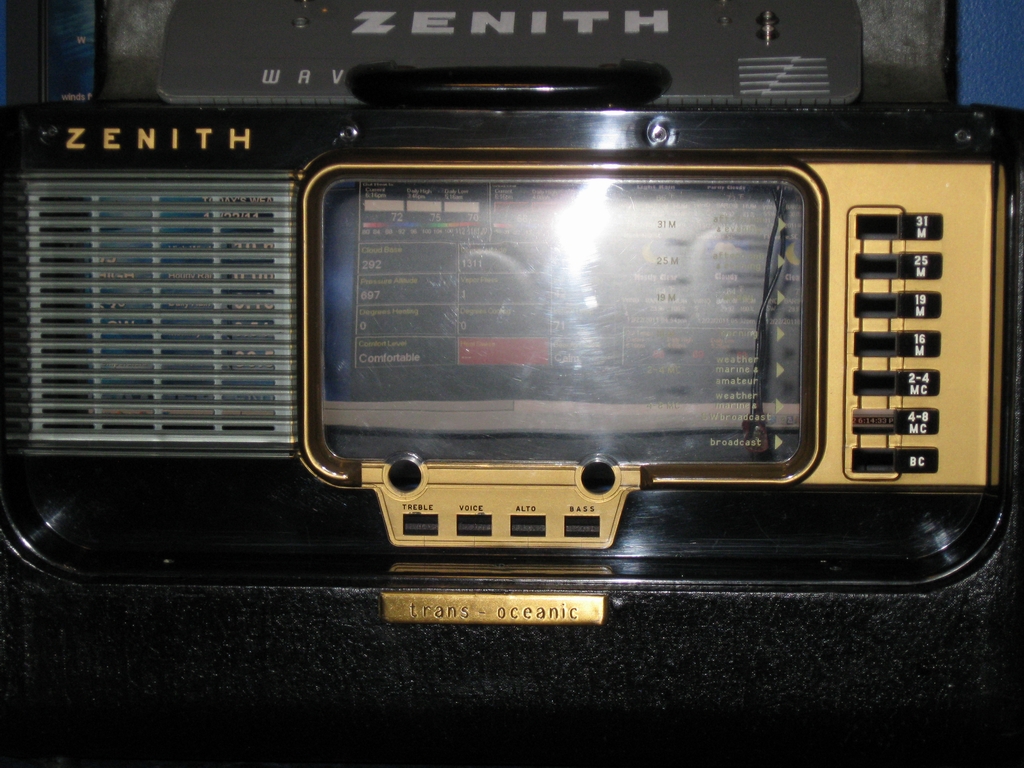 The
Front Panel - Here you see the front panel for the H500. Generally in very
good shape, but you can see some very small stress cracks below the tone
switches and around the tuning and volume knobs and some of the gold paint has
flaked off over the treble and voice switches. A little touch-up Gold Faspearl
paint and a good polishing with Novis
should cover/fix those. Also you can see that the dial face is a bit hazy and
there are also some light scratches around the volume and tuning knob holes.
This is normal for a radio of this age and Novis makes polish
with a tiny bit of abrasive that will take care of it.
The
Front Panel - Here you see the front panel for the H500. Generally in very
good shape, but you can see some very small stress cracks below the tone
switches and around the tuning and volume knobs and some of the gold paint has
flaked off over the treble and voice switches. A little touch-up Gold Faspearl
paint and a good polishing with Novis
should cover/fix those. Also you can see that the dial face is a bit hazy and
there are also some light scratches around the volume and tuning knob holes.
This is normal for a radio of this age and Novis makes polish
with a tiny bit of abrasive that will take care of it.
 Polish
#1 - Looks a bit better after the first round of polish doesn't it? The
lettering for the band buttons and the keyboard Function buttons can be seen
much better. Also the Wave Magnet is looking better too. The case looks like new
again after receiving it's final polishing.
Polish
#1 - Looks a bit better after the first round of polish doesn't it? The
lettering for the band buttons and the keyboard Function buttons can be seen
much better. Also the Wave Magnet is looking better too. The case looks like new
again after receiving it's final polishing.
 The
LATCH - Here is the latch assembly after being reinstalled and aligned. It
would not close properly as it was. I was able to "shift" it slightly as I
tightened the mounting screws to get things to mate. Also you see more of the
case with the lid down here too. Lookin' Good! I was worried that the corners
would be beaten and torn but they weren't. You can see also that I had not yet
installed the top piece of wood that the handle attaches to. It's just kind of
laying there on top with the Wave Magnet and some hardware on it.
The
LATCH - Here is the latch assembly after being reinstalled and aligned. It
would not close properly as it was. I was able to "shift" it slightly as I
tightened the mounting screws to get things to mate. Also you see more of the
case with the lid down here too. Lookin' Good! I was worried that the corners
would be beaten and torn but they weren't. You can see also that I had not yet
installed the top piece of wood that the handle attaches to. It's just kind of
laying there on top with the Wave Magnet and some hardware on it.
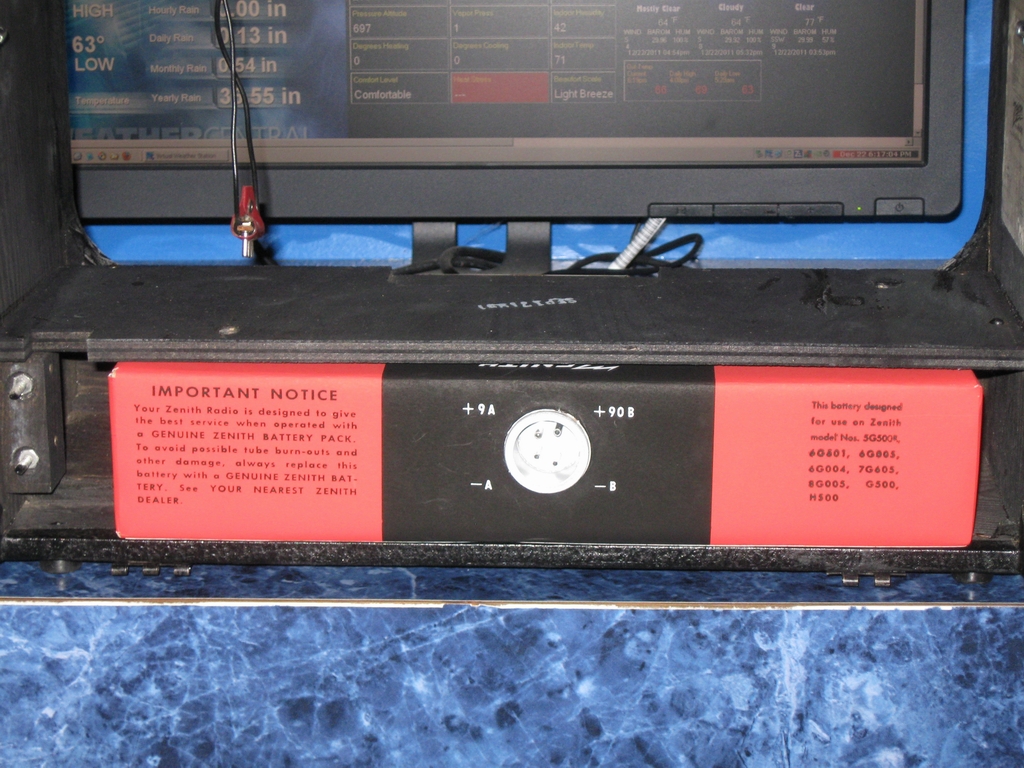 Battery
Anyone? - Well I have a battery for my new Trans-oceanic. Not really, the
box is a replica you can purchase off the web along with the mating male power
receptacle. Here is a link
http://home.comcast.net/~morrised2006/radios/radio6.htm You can see the
mounting studs for the telescoping antenna on the left after a good cleaning.
Battery
Anyone? - Well I have a battery for my new Trans-oceanic. Not really, the
box is a replica you can purchase off the web along with the mating male power
receptacle. Here is a link
http://home.comcast.net/~morrised2006/radios/radio6.htm You can see the
mounting studs for the telescoping antenna on the left after a good cleaning.
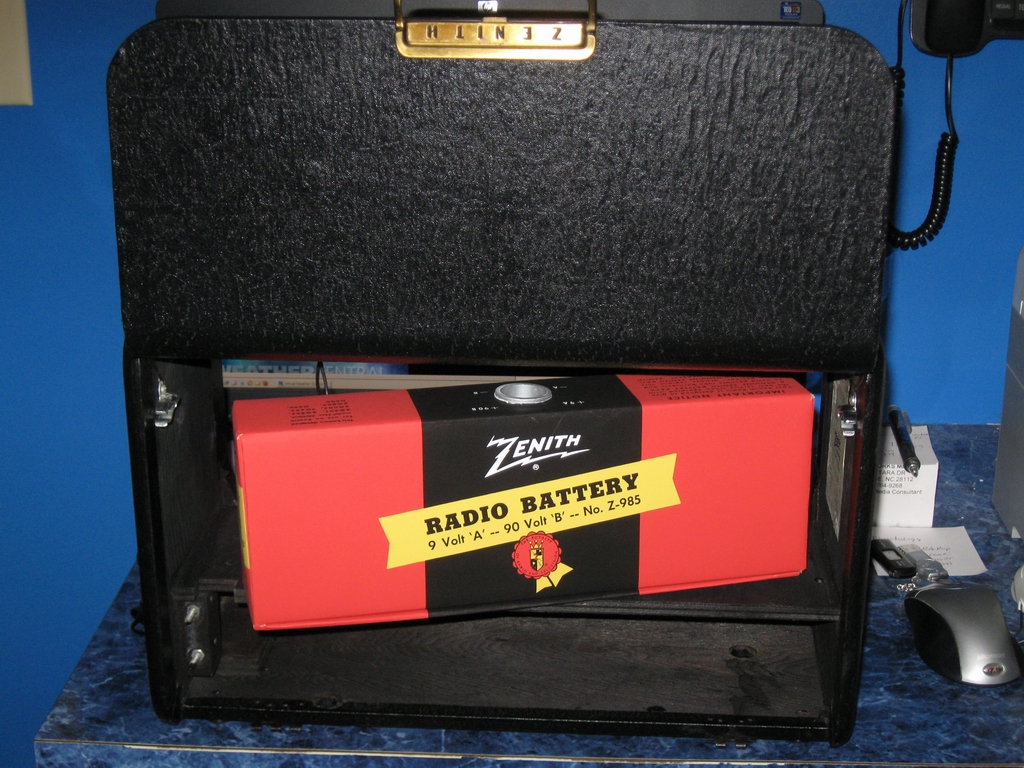 Battery
Box - Here is another shot of the replica battery box showing the Zenith
Logo. Also at the site where you can purchase this box there is a good bit of
information for how to build your own battery from a number of AA/D cells or
9volt/D cells. Good information for sure.
Battery
Box - Here is another shot of the replica battery box showing the Zenith
Logo. Also at the site where you can purchase this box there is a good bit of
information for how to build your own battery from a number of AA/D cells or
9volt/D cells. Good information for sure.
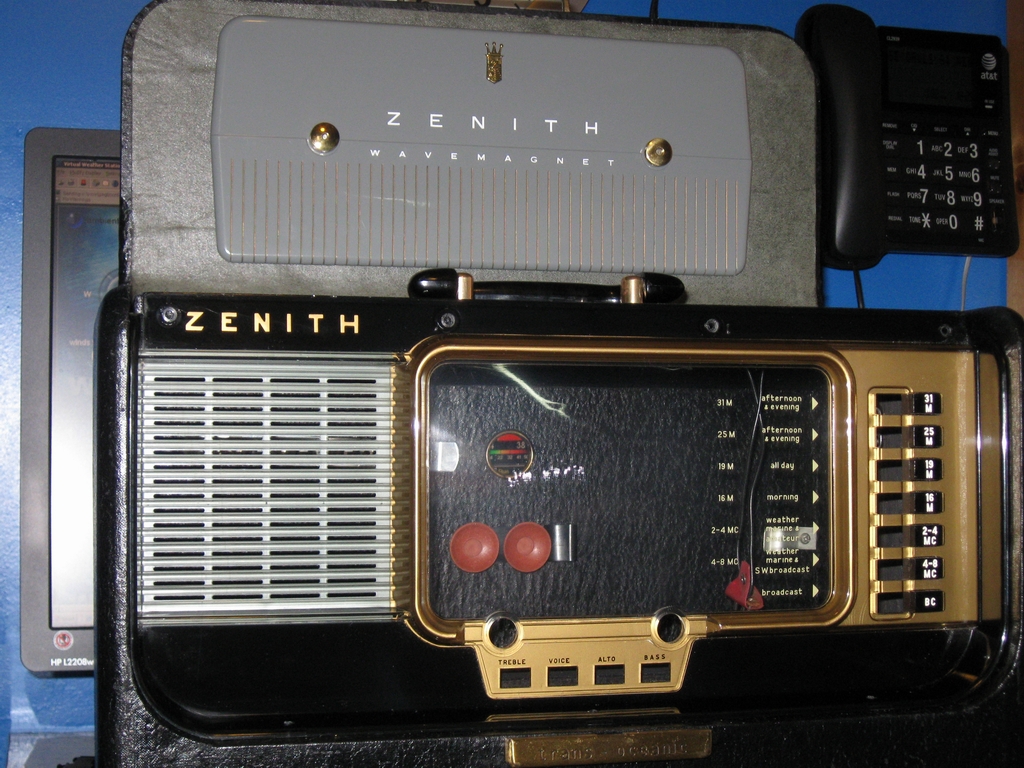 Case
is Finished - Case is reassembled, Wave Magnet cleaned and polished, Front
Panel cleaned, polished and fully restored and all brass polished nice and
shiny. Just need to finish the chassis and reinstall. Waiting on parts sucks!
Case
is Finished - Case is reassembled, Wave Magnet cleaned and polished, Front
Panel cleaned, polished and fully restored and all brass polished nice and
shiny. Just need to finish the chassis and reinstall. Waiting on parts sucks!
Capacitors In - OK Finally got the last
parts I needed and now I have replaced the power supply electrolytic capacitors.
On to replace the
power resistor with a new one or two.
Power Resistor - Last time you looked
at a picture of the area there was an old ugly red in color 130 ohm power
resistor located here. That has been replaced by 2 larger new resistors. 10
watts each, one a 30 ohm unit and the other a 100 ohm unit. Why two? Well I
couldn't get the value I needed with only one, so I used two in series.
Back Home - After all the work, it finally
comes to an end! Back in the case
goes the chassis, ready for testing on AC and DC. Fingers crossed!
Batteries Rule! - Got the battery pack
ready to slide in under the chassis. Looking for some long life with the copper
tops. Should get over 400 hours with the B+ AA batteries (meter showed 97 volts
with new cells). Specifications call for B+ of 90 to 105 V DC. The A filament
supply read at 9.57 volts and specifications call for 9 volts. I should get
about 200 hours from the D cells in the A supply. Doesn't sound like much does
it? Well that works out like this, using the radio 3 hours a day average, will
give me over 66 days on the D cell batteries and over 133 days on the AA cells.
How much do you listen to a radio per day?
Ready to Go - OK I think I've done
enough damage. This thing is ready to ROCK!
OOPS - I thought I was finished, but it
seems I left a finger print good enough for CSI to track me down!
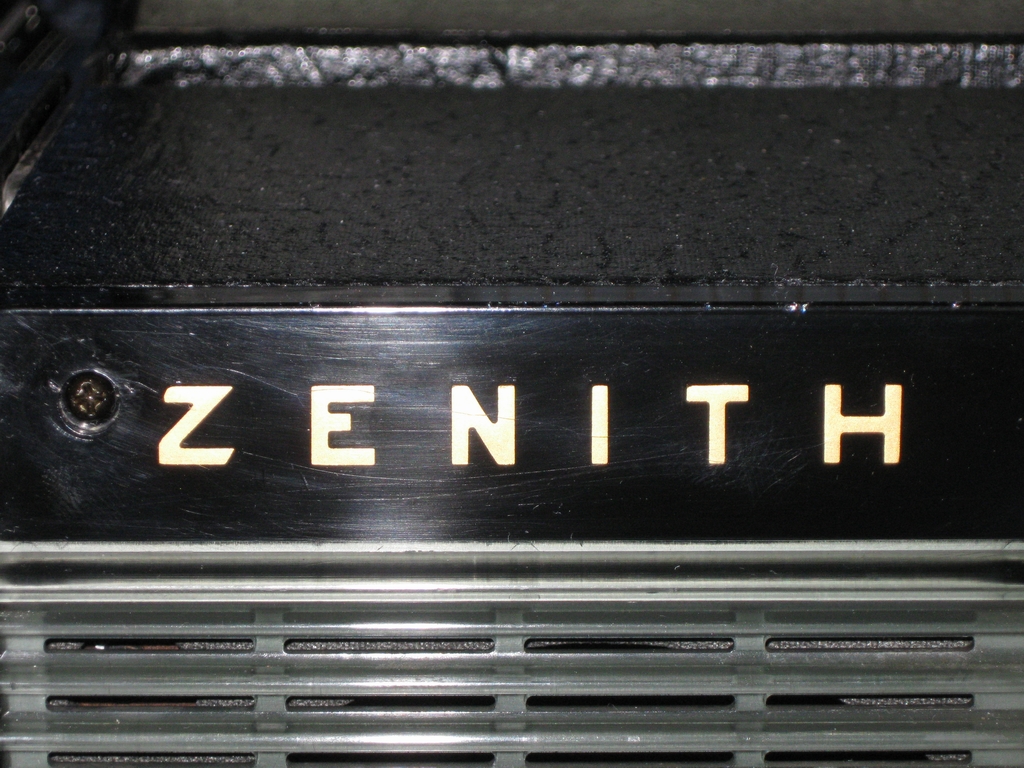
Zenith - I think this about says it
all. Now to relax and listen to Radio Havana or Voice of Russia or BBS World
service or whatever......
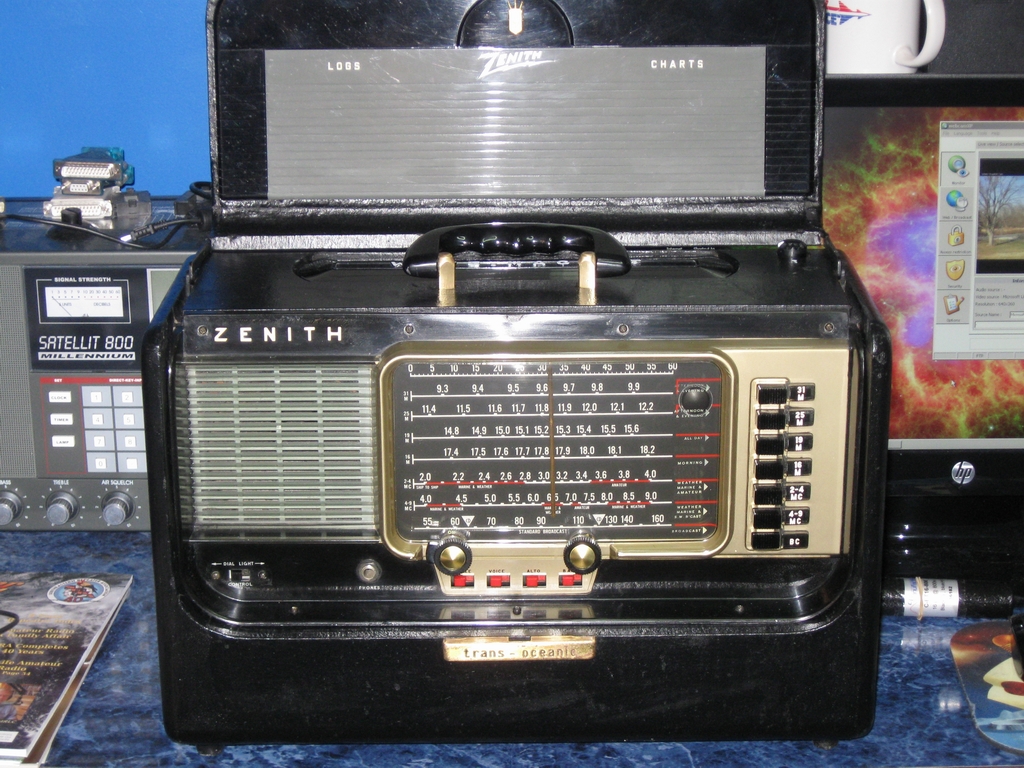
Zenith B600 Trans-oceanic - Here is my
B600 from 1962 after I restored it. Not quite as pretty as the H500 but still a
very nice example with just a few blemishes to the front panel. Also Zenith
slightly changed the color of the gold paint to a lighter shade.
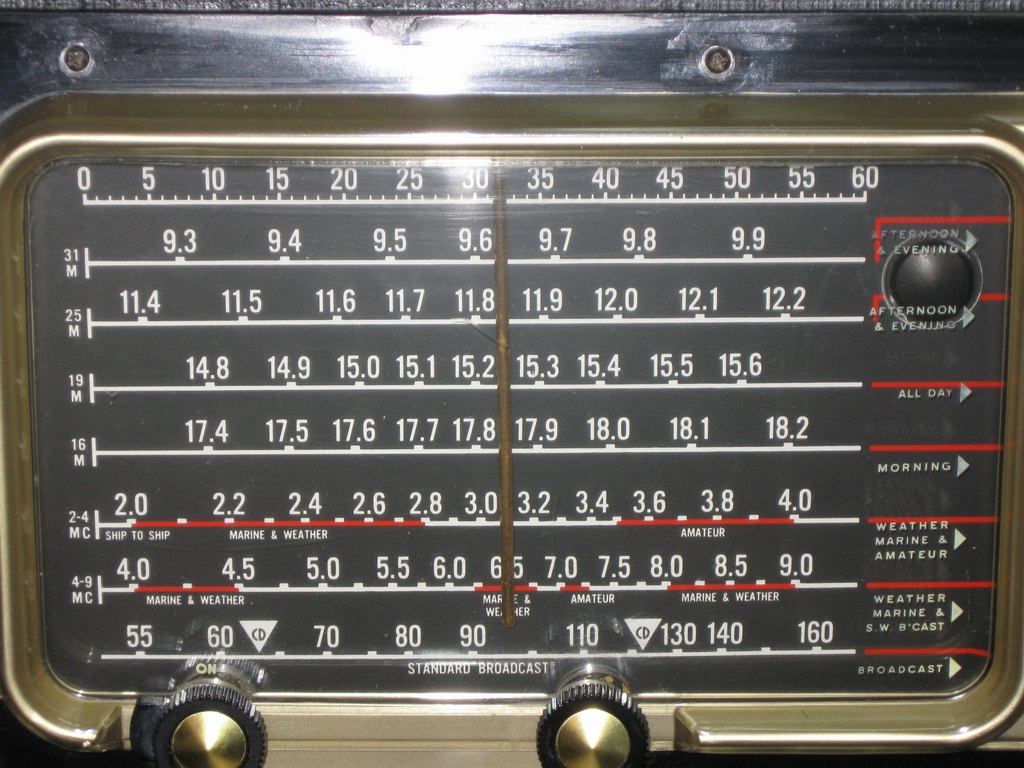
Front Dial - Here you can see the two
blemishes. At the very top between the screws a chip in the plastic has been
repaired that not quite covers the break. This was done by a former owner. Also
in the dial face right under 11.8 a scratch that was too deep to remove.
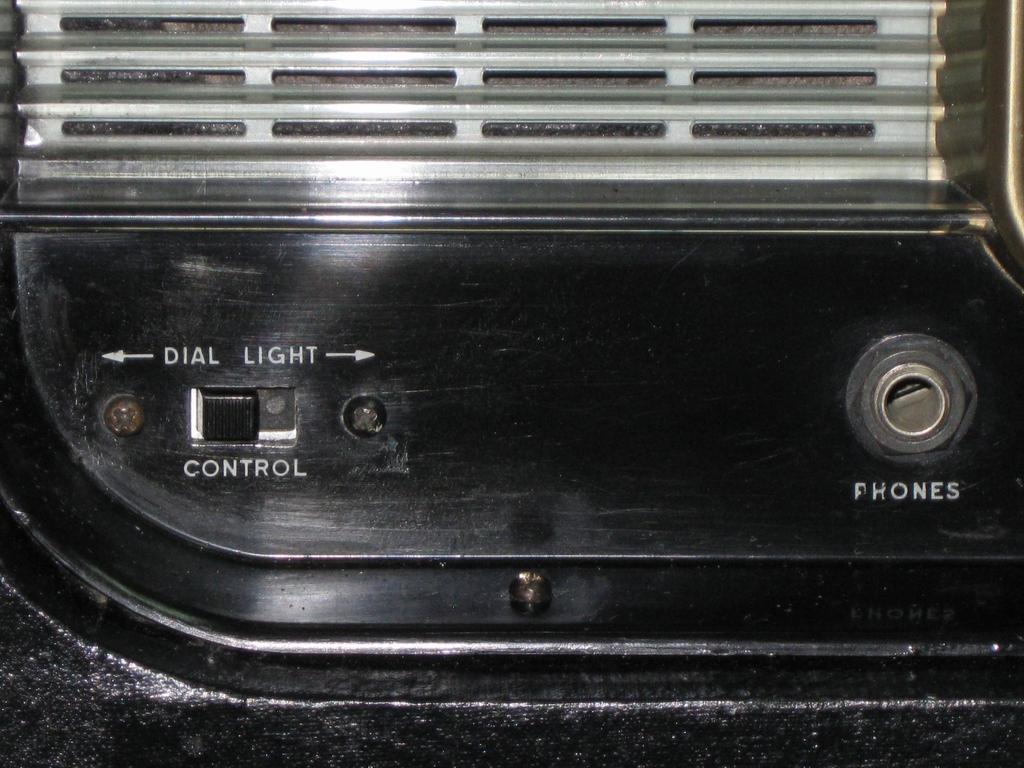
Dial Light and Phone Jack - Front
mounted phone jack and dial light switch was added to the B600. You can
also see some of the slight crazing of the plastic around the left screw of the
dial light. Sometimes old plastic will begin to fracture around stress points. I
repainted the back side of the panel with black and gold paints to cover most of
this, but some still show through.
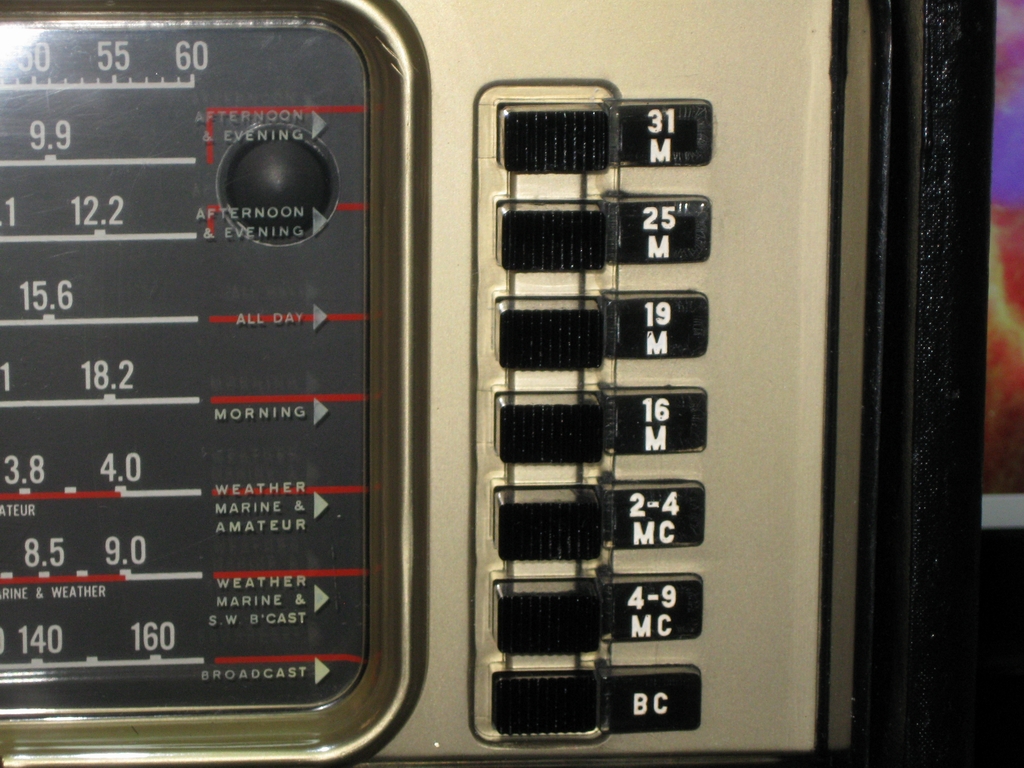
Band Switches - Only difference between
the H500 and B600, 4-8 MC on the H500 and 4-9 MC on the B600. You can also see
some crazing at the 31 M label and the 25 M label areas.
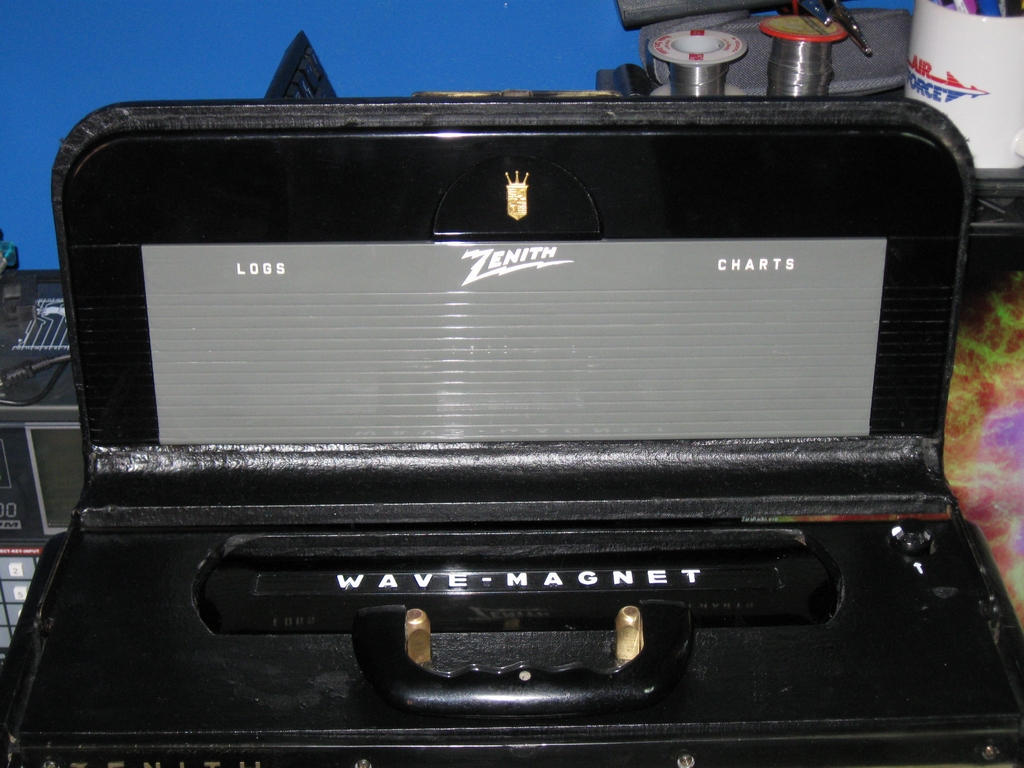
Wave-Magnet and Chart Holder - Cleaned
and polished, both the chart holder and wave-magnet look good. All labeling was
repainted along with the Gold Zenith crest and the whip unlocking arrow.
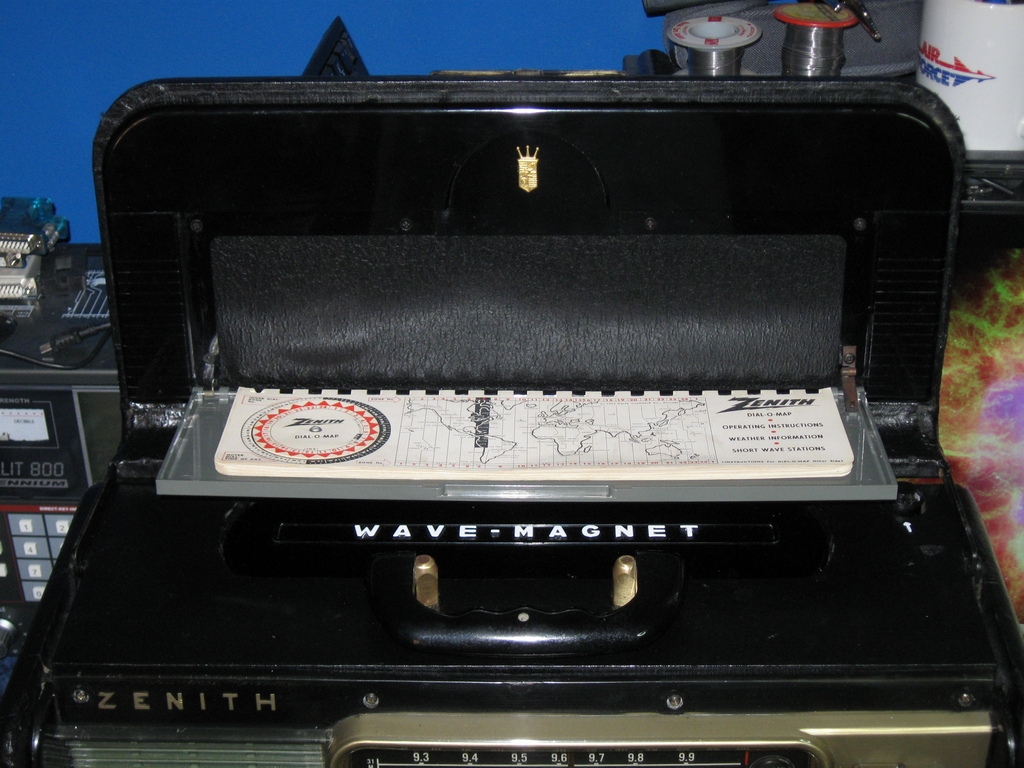
Chart - The chart on this B600 was in
excellent shape. All pages present and undamaged except for some slight age
yellowing.
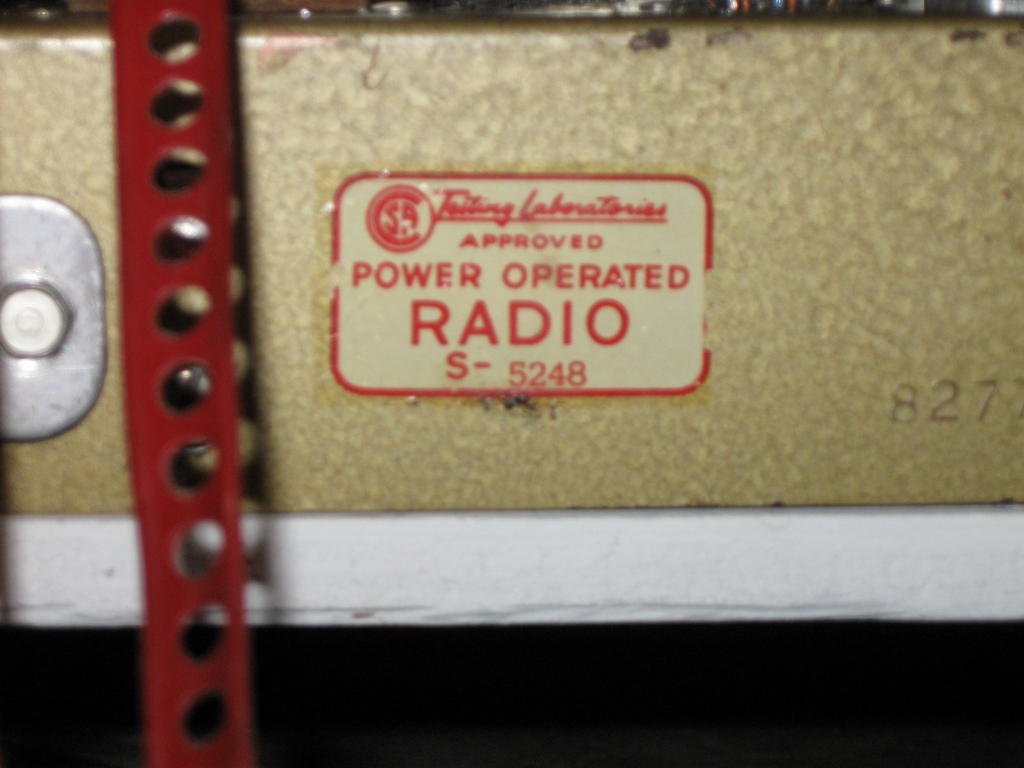
Consumer Safety Association? - I guess
this was before Underwriters Labs. Also at some point in the past a previous
owner had used some type of oil or lubricant that over time turned into a tarry
mess. Some of the residue can be seen under the label and above. I was unable to
get it all off.
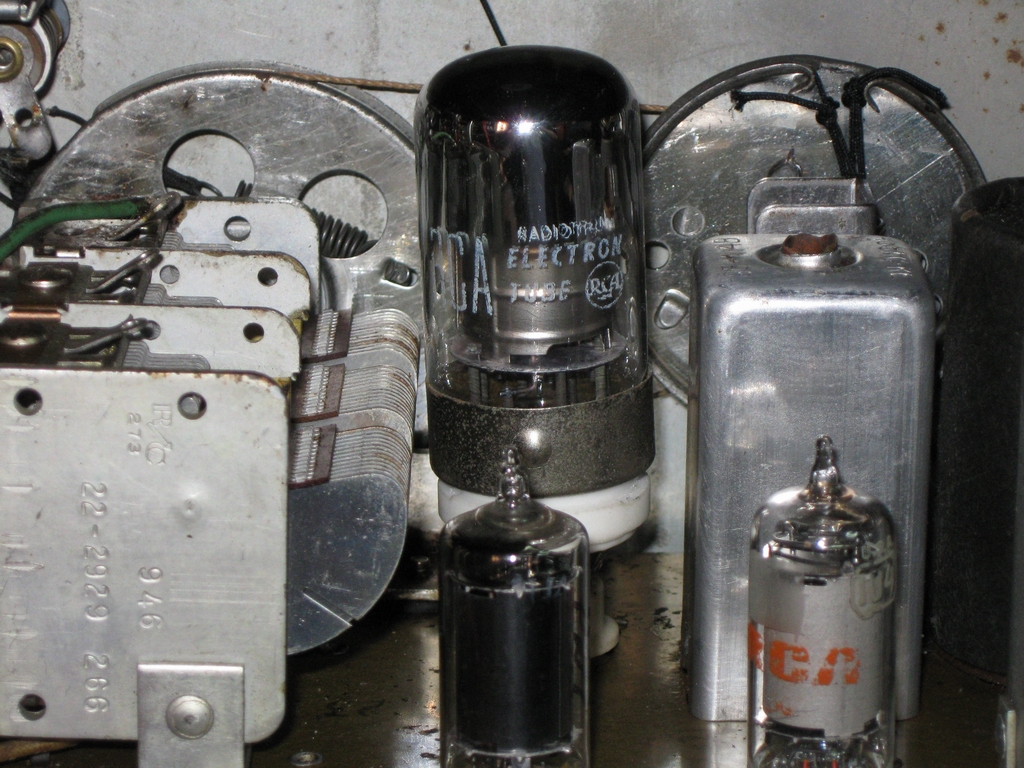
Replacement for the 1L6 - It's a tight
fit, but a 1LA6 will fit into the place. You can also see of the the tarry
residue on the main tuning capacitor and other areas in the picture.
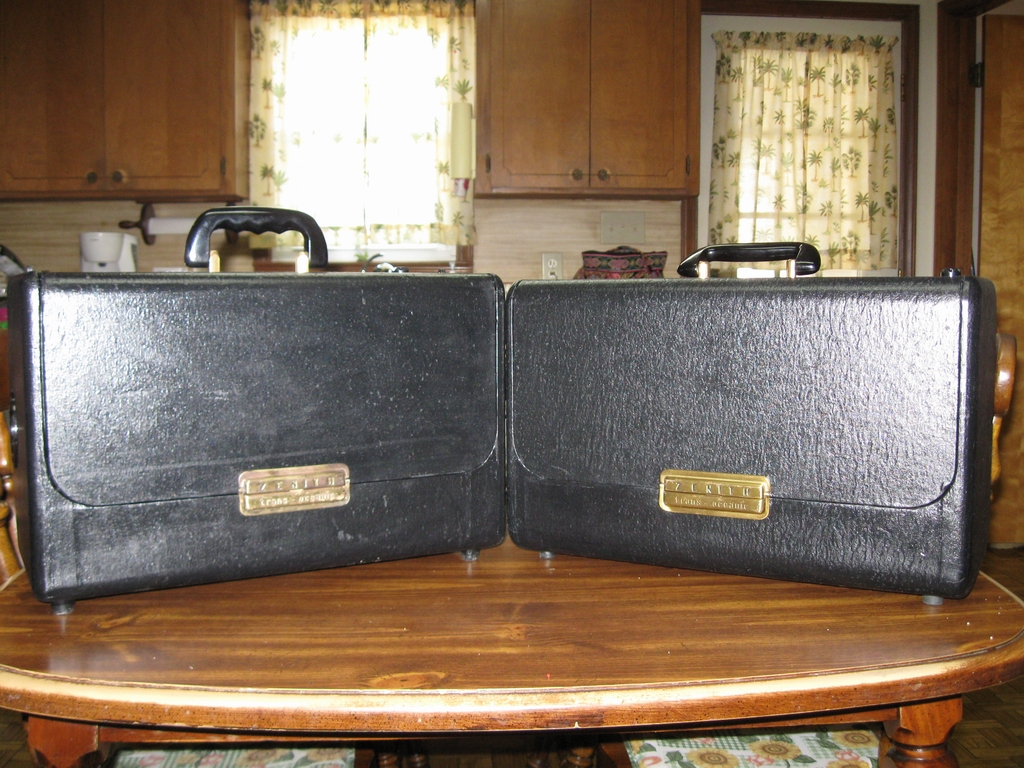
Twins Almost - Here you see the B600 on
the left and the H500 on the right. Close but no cigar. The covering on the
cabinet of the B600 was not as "leathery" looking as the H500. The B600 has a
bit taller feet. Also the latch on the B600 still shows some tarnishing. That is
a future cleaning project.
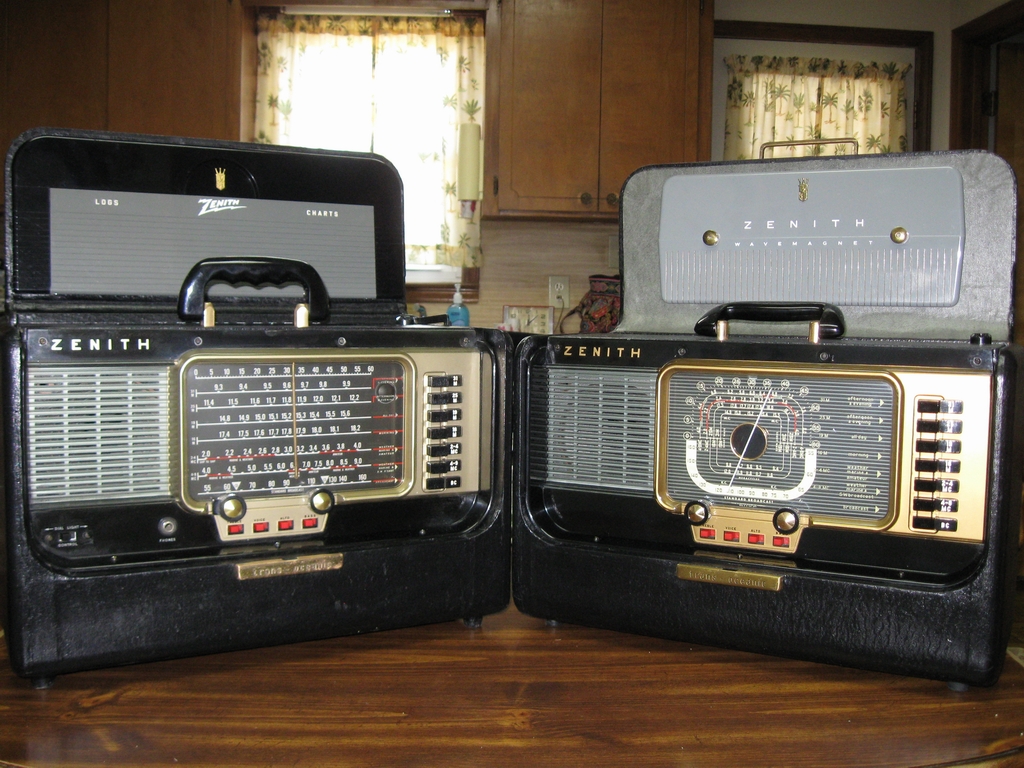
Color Changes - Here you can see the
slightly lighter gold color on the B600 compared to the H500. I like the deeper
gold on the H500 as it seems to just shine more. Also the dial differences can
be seen. For me the H500 is my favorite, I just like the "retro" look of the
rounded dial, even though the B600 is easier to tune. On the H500 you have the
Wave-Magnet in the lid, on the B600 you have the Chart and Log holder.
Did I learn anything from
this project? Yes several things in fact.
First, Anyone can do a
very decent restoration on most old radios if you take your time and follow a
few simple rules.
1. GO Slow, the radio
didn't get this old in a day, don't make it age any faster.
2. Simple usually works
good. You don't need the latest and greatest of anything for this project.
Question yourself every time you decide to do something.
3. Research, Read, Research
and Read some more. Gather all the information from as many sources as you
can, ask questions, get ideas. You can never know enough about what you are
trying to do and the internet really makes it easy. Google searches will bring
you a wealth of information.
On the 1L6 tube issue. Yes, you can replace the 1L6 with a direct pin for pin
replacement 1LA6.....BUT, you will need an adapter. You can make one for
yourself or find one on EBay. So far I've found the 1LA6 performance to be
nearly identical to the 1L6. The tuning on some bands may be slightly off due to
inter-electrode capacitances, but hardly noticeable with a careful alignment. If
you align the radio using the 1L6, then replace it with the 1LA6 your tuning
will be off progressively worse as you move to the higher bands. So you will
have to decide which tube you plan to use and align the radio with that tube if
you want the tuning dial to be fairly accurate.
These radios are super sensitive! I could not believe how well they pull in
signals on the whip antenna! I am comparing them to my Grudig Satellit 800
Millennium. They
OUT receive the Grudig hands down. The B600 is also quieter. The Grudig has garbage
coming in from it's own internal processor and the display driver chip. None
that on the Zenith's for sure.....and with a careful, slow detailed alignment you
don't need no stinkin' digital display! And playing with these radios is just
plain FUN!
Questions on
what you see here? Click here to send me an email!
This site is the property of WB4U.
Unauthorized duplication or
distribution is prohibited